Upgrading a Used
Taurus PT111 G2
by Roy
Seifert
Click here to purchase a zip file with this and
all Kitchen Table Gunsmith Articles.
Disclaimer: This
article is for entertainment only and is not to be used in lieu of a
qualified gunsmith. Please
defer all firearms work to a qualified gunsmith.
Any loads mentioned in this article are my loads for my
guns and have been carefully worked up using established guidelines and
special tools. The
author assumes no responsibility or liability for use of these loads,
or use or misuse of this article.
Please note that I am not a
professional gunsmith, just a shooting enthusiast and hobbyist, as well
as a tinkerer. This
article explains work that I performed to my guns without the
assistance of a qualified gunsmith.
Some procedures described in this
article require special tools and cannot/should not be performed
without them.
Warning: Disassembling
and tinkering with your firearm may void the warranty.
I claim no responsibility for use
or misuse of this article. Again,
this article is for entertainment purposes only!
Tools
and firearms are the trademark/service mark or registered trademark of
their respective manufacturers. Click on any
blue text to go to a
product/seller web site.
Introduction
I have two 9mm semi-autos in my collection; a Beretta 92FS and a 1911 double
stack that I built from parts, but both are too large for every day carry.
I wanted a smaller 9mm pistol for everyday carry.
When I get an idea to purchase another gun, I like to go to
Gunbroker.com to look for a lightly used
model on which no one else is bidding.
In my experience the gun usually has some cosmetic flaws, which for some
reason people don’t want to buy, but functions perfectly.
And, it usually doesn’t have an extensive number of rounds fired through
it so it’s not worn out. My
exception was a Phoenix Arms HP22 I purchased with a broken sear which I was
able to replace to get the pistol functioning again (refer to my article
Repairing a Phoenix Arms HP22).
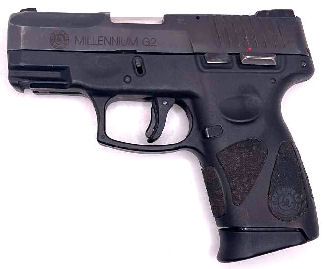
Gunbroker.com Purchase
I’ve always been impressed with the Taurus Millennium series of pistols ever
since my neighbor showed me the model he purchased.
I already own a Taurus PT 24/7 Pro C DS in .45 Auto, and at one time I
had one in .40 S&W, so I started looking for a similar model in 9mm.
I
found a 9mm PT111 G2 model on Gunbroker.com
for a very reasonable price. It had
some holster wear and scratches on the slide, but otherwise looked ok.
No one wanted to purchase this pistol because of its looks, and the
seller took a credit card with no credit card fee!
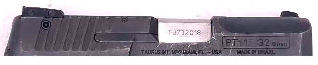
One of
the major differences between the PT111 and PT111 G2 (generation 2) is the
takedown method. The generation 1
model used a takedown lever similar to my PT 24/7 that had to be rotated and
pulled out to remove the slide assembly.
The generation 2 model uses a button that needs to be pushed down on both
sides to remove the slide assembly.
I like the sliding button method better.
Refinishing the Gun
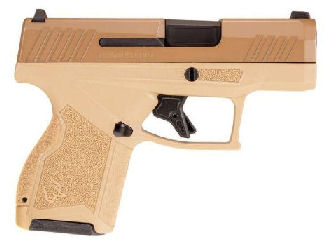
One of
the Taurus models that appealed to me was the
GX4 but I decided I didn’t want the “micro-9” configuration.
However, I really liked the tan color.
There are a number of popular firearm finishes available to the hobby
gunsmith.
KG Guncoat 2400, Duracoat,
Brownell’s Aluma-Hyde, Cerakote,
hydrographics,
powder coating, and
paint. KG Guncoat is a one-part,
bake-on finish. I have a toaster
oven in my shop I can use to bake the finished parts.
Duracoat is a two-part epoxy finish that does not require baking, but the
two parts must be properly measured and mixed.
I have used Duracoat in the past and like the results.
Cerakote has a number of finishes; some are two-part and some require
baking, but can be difficult to use.
Brownell’s Aluma-Hyde is an epoxy-based finish that comes in a spray can.
It can be applied with minimal preparation work.
As for
paint, I’ve painted two rifles with a camouflage pattern (refer to my articles
Building a Backpacker
“Scout” Rifle and
Improving a Chinese Polytech M14S).
After painting I sprayed a matt clear coat on the rifles to prevent wear.
Paint is thick and not the most durable finish, but it is very easy to
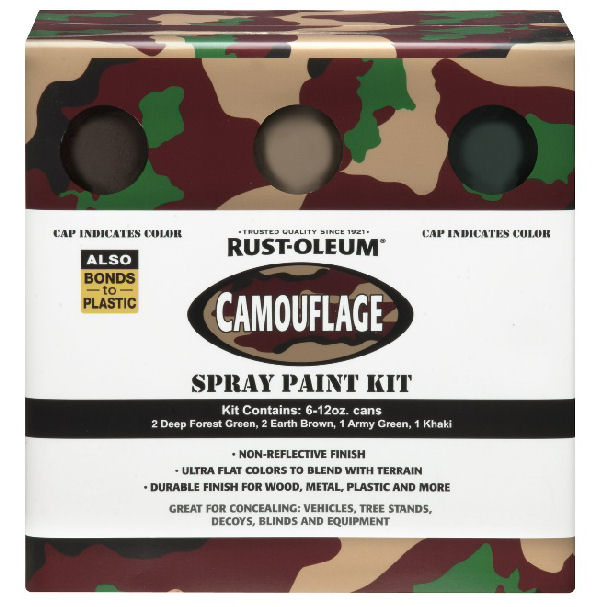
repair. Rust-Oleum makes a 6-can
camouflage kit that is very affordable and is available from
Amazon. I have used this before
with excellent results.
Hydro-dipping is the process of dipping the gun into a liquid hydrographic
pattern so it adheres to the part. I
hydro-dipped a shotgun for my nephew (refer to my article
DIY Camouflage for a
Shotgun), Once the part is
dipped, rinsed and dried it is coated with a matt clear coat to protect the
finish. The different patterns are
fantastic, but I don’t have any experience with the durability.
Some hydrographic films require two coats of paint; a self-etching primer
then a base coat color, which can be too thick.
Powder
coating applies a colored powder to the part which adheres by static
electricity. The part is then heated
so the powder melts to the surface.
This is a very durable finish, but is very thick; it can affect mating
tolerances of parts. Reloaders are
now powder coating cast bullets to get cleaner, higher velocities with no
leading.

I
decided to use Brownell-s Aluma-Hyde II Desert Tan which looked similar to the
Taurus FDE. I had a can left over
from another project. When I tested
the old can the paint came out in splotches so I purchased a new can.
Preparing the Slide and Frame
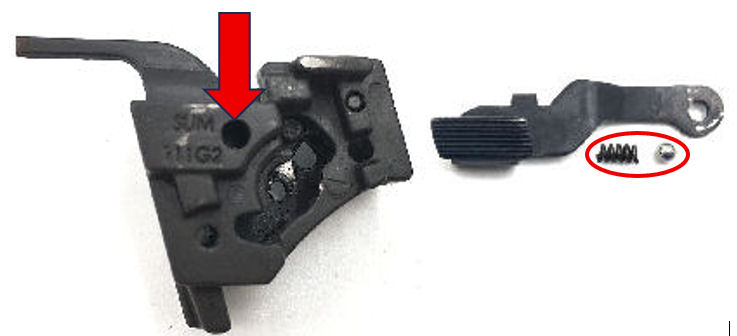
I
completely stripped the slide and frame to prepare for painting.
The frame has three parts that are easy to lose; the slide catch spring
in the central support, and the safety detent ball and spring in the mechanism
support. I placed all loose parts in
a plastic tub so they wouldn’t get lost.
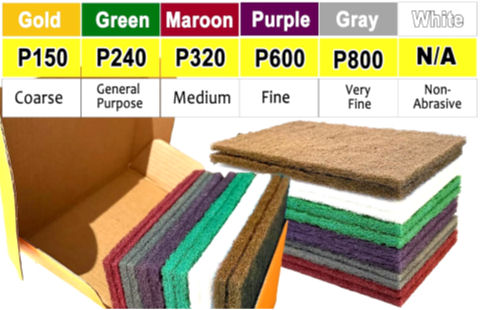
I
purchased a set of
Mesh Might scuff pads from Amazon.
I used a green, 240-mesh pad to rough-up the slide.
I rubbed until the bare metal just started to appear.
I masked the areas I didn’t want to paint and inserted a 1/2-inch dowel
in the barrel opening to hold the slide.
I thoroughly cleaned the slide with isopropyl alcohol.
I sprayed a single coat of the Aluma-Hyde onto the slide and used my heat
gun to dry it.

I
placed the slide in my toaster oven and baked it at 200o for
3.5-hours as recommended on the Aluma-Hyde II can.
Until the slide was baked, I wore nitrile gloves to handle it.
I didn’t want to get any skin oils on the cleaned or painted slide.
After
I disassembled the frame, I masked the interior so it wouldn’t get coated.
I also masked the serial number on the bottom of the frame.
It is illegal to modify the serial number in any way.
I again cleaned the exterior thoroughly with isopropyl alcohol and
handled it only with nitrile gloves on my hands.
I painted the frame with one coat of the Aluma-Hyde II and allowed it to
cure for one day.
I did
some extensive research on whether I could bake the polymer frame which provided
me with mixed results. Some say do
it, some say not to, some say bake at a lower temperature.
My research also said that most polymer frames are made from Nylon 6/6
which has glass fibers added for strength.
I Googled the melting point of plastic and found the chart shown in
Appendix A at the end if this article.
It shows the melting point of Nylon 6/6 as over 500o
Fahrenheit so I didn’t worry about baking it.
I put the frame in my toaster oven set to 100o for 2.5 hours
and it came out perfectly.
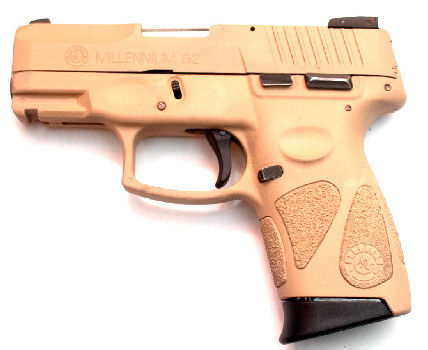
I
completely reassembled the slide and frame.
As you can see from the above photo, I am very pleased with the results.
I didn’t paint the bottom of the magazine because I didn’t want to wait
for the paint to cure.
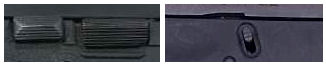
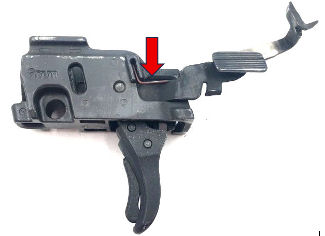
Modifying the Factory Trigger
I
decided to try to modify the factory trigger into a short stroke trigger.
I roughened the undercut in the front of the factory trigger and drilled
two 1/16 holes on each side to help hold epoxy.
I placed two brass shims on either side of the trigger coated with paste
wax to act as a dam. I mixed some
JB-Weld and applied it to the front of the trigger building it up.
The brass shims prevented the epoxy from running out.
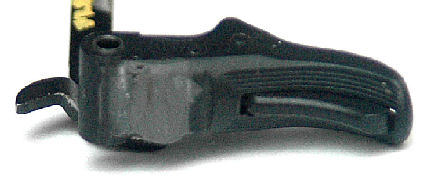
Once
the epoxy cured, I filed it down until the trigger would function to my liking.
You can see the epoxy in the above photo.
Because the trigger is now so far back the trigger safety no longer
engages and I don’t have second strike capability.
However, the amount of trigger take-up before hitting resistance is now
only 1/8 inch which makes the initial and backup shots quick without that long
take up for the first shot. Because
the trigger safety is no longer working, I decided to remove it and save it in
my PT111 spare parts bin. I may
build up the front of the trigger with epoxy then shape it to give me a bit more
thickness.
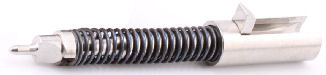
Replacing the Recoil Spring Assembly
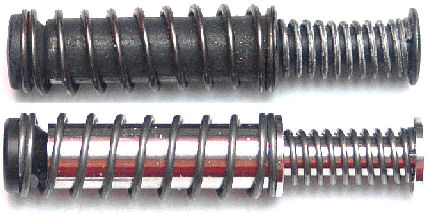
I
purchased a
stainless-steel recoil assembly from
Lakeline LLC. This is a drop-in
part that replaces the factory recoil assembly.
I removed the slide from the frame, removed the factory recoil spring
assembly, and replaced it with the stainless-steel version.
I added a few drops of oil to each spring before installing into the
slide.
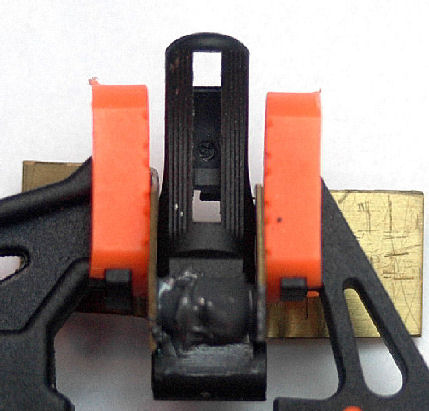
Replacing the Plastic Firing Pin Sleeve
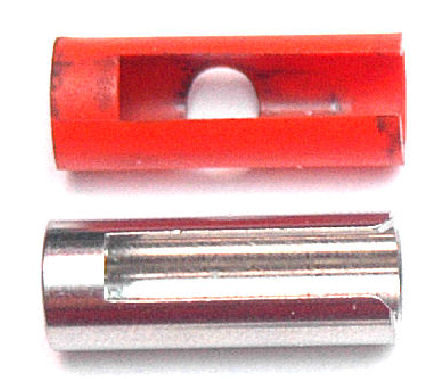
I also
purchased a
stainless-steel firing pin sleeve from Lakeline LLC (they call it a striker
guide). This replaces the factory
plastic sleeve. Bear Family
Homesteading has a
YouTube video
on how to remove and replace the firing pin/striker.
I installed the new sleeve as follows:
1.
Ensure
the gun is clear and the magazine is removed.
2.
Remove
the slide from the frame.
3.
Turn
the slide upside down and press the orange plastic sleeve towards the front of
slide.
4.
Remove
the slide cap.
5.
Carefully release spring tension from the striker and sleeve.
6.
Remove
the striker and sleeve.
7.
Place
the striker assembly on a hard surface with the sleeve down.
8.
Press
down on the firing pin spring and remove the two plastic retaining clips from
the firing pin.
9.
Carefully remove spring tension and remove the spring and sleeve.
10.
Install the new sleeve.
11.
Place
the assembly with the sleeve down on a 1/8 piece of wood or a wooden dowel.
This is to prevent the striker from falling down inside the sleeve.
12.
Press
down on the firing pin spring to expose the collar at the top of the firing pin
and install the two retaining clips.
13.
Carefully release spring tension so the spring covers the two retaining clips.
I
added a couple drops of oil to the firing pin spring before installing it in the
slide. I installed the assembly into
the slide. I used a small punch to
push down on the rear of the sleeve so I could install the slide cap.
Polishing the Striker

Before
I installed the new sleeve I polished the sear surface.
This had tooling marks from the factory.
I first polished with an 800-grit stick from my
Boride Engineered Abrasives Gunsmith Action Kit,
These stones use oil as the cutting and
cleaning agent.
I
finished polishing with
Brownells Extra Fine Ceramic Stone.
This makes the surface mirror smooth.
After I installed the striker I place some
Brownells Action Lube Plus on the striker sear surface and on the sear in
the frame.
Summary
I am very pleased with how this gun came out.
Now time will tell how durable this coating is and how long it will last.
Addemdum
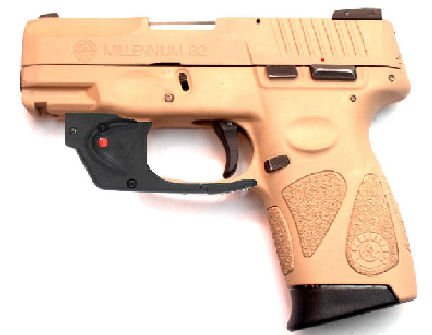
I
purchased a used
Viridian red laser from ebay which fit the pistol perfectly.
The red dot was nice and bright and was easy to adjust to the sights.
Because it was used it didn’t come with any tools, but I used a TORX T6
for the mounting screws and a 0.050 hex wrench to adjust the laser.
This sight adds very little weight to the pistol but makes it easier to
use.
Appendix A:
Polymer Melting and Mold Temperatures
|
MATERIAL
|
MELT TEMP RANGE (℃)
|
MOULD TEMP RANGE (℃)
|
MELT TEMP RANGE (℉)
|
MOULD TEMP RANGE (℉)
|
|
ABS
|
190-270
|
40-80
|
374-518
|
104-176
|
|
ABS/PC ALLOY
|
245-265
|
40-80
|
473-509
|
104-176
|
|
ACETAL
|
180-210
|
50-120
|
356-410
|
122-248
|
|
ACRYLIC
|
220-250
|
50-80
|
428-482
|
122-176
|
|
CAB
|
170-240
|
40-50
|
338-464
|
104-122
|
|
HDPE
|
210-270
|
20-60
|
410-518
|
68-140
|
|
LDPE
|
180-240
|
20-60
|
356-464
|
68-140
|
|
NYLON 6
|
230-290
|
40-90
|
446-554
|
104-194
|
|
NYLON 6 (30% GF)
|
250-290
|
50-90
|
482-554
|
122-194
|
|
NYLON 6/6
|
270-300
|
40-90
|
518-572
|
104-194
|
|
NYLON 6/6 (33% GF)
|
280-300
|
40-90
|
536-572
|
104-194
|
|
NYLON 11
|
220-250
|
40-110
|
428-482
|
104-230
|
|
NYLON 12
|
190-200
|
40-110
|
374-392
|
104-230
|
|
PEEK
|
350-390
|
120-160
|
662-734
|
248-320
|
|
POLYCARBONATE
|
280-320
|
85-120
|
536-608
|
185-248
|
|
POLYESTER PBT
|
240-275
|
60-90
|
464-527
|
140-194
|
|
PET (SEMI CRYSTALLINE)
|
260-280
|
20-30
|
500-536
|
68-86
|
|
PET (AMORPHOUS)
|
260-280
|
20-30
|
500-536
|
68-86
|
|
POLYPROPYLENE (COPOLYMER)
|
200-280
|
30-80
|
392-536
|
86-176
|
|
POLYPROPYLENE (HOMOPOLYMER)
|
200-280
|
30-80
|
392-536
|
86-176
|
|
POLYPROPYLENE (30% TALC FILLED)
|
240-290
|
30-50
|
464-554
|
86-122
|
|
POLYPROPYLENE (30% GF)
|
250-290
|
40-80
|
482-554
|
104-176
|
|
POLYSTYRENE
|
170-280
|
30-60
|
338-536
|
86-140
|
|
POLYSTYRENE (30% GF)
|
250-290
|
40-80
|
482-554
|
104-176
|
|
PVC P
|
170-190
|
20-40
|
338-374
|
68-104
|
|
PVC U
|
160-210
|
20-60
|
320-410
|
68-140
|
|
SAN
|
200-260
|
50-85
|
392-500
|
122-185
|
|
SAN (30% GF)
|
250-270
|
50-70
|
482-518
|
122-158
|
|
TPE
|
260-320
|
40-70
|
500-608
|
104-158
|
|
