Replacing a Ruger® Single-Six® Firing Pin
by Roy Seifert
Click here to purchase a
CD with this and all Kitchen Table Gunsmith Articles.
Disclaimer:
This article is for entertainment only and is not to
be used in lieu of a qualified gunsmith.
Please defer all firearms work to a qualified
gunsmith. Any loads
mentioned in this article are my loads for my guns and have
been carefully worked up using established guidelines and
special tools. The
author assumes no responsibility or liability for use of
these loads, or use or misuse of this article.
Please note that I am not a professional gunsmith,
just a shooting enthusiast and hobbyist, as well as a
tinkerer. This
article explains work that I performed to my guns without
the assistance of a qualified gunsmith.
Some procedures described in this article require
special tools and cannot/should not be performed without
them.
Warning:
Disassembling and tinkering with your firearm may
void the warranty. I
claim no responsibility for use or misuse of this article.
Again, this article is for entertainment purposes
only!
Tools
and firearms are the trademark/service mark or registered trademark
of their respective manufacturers.
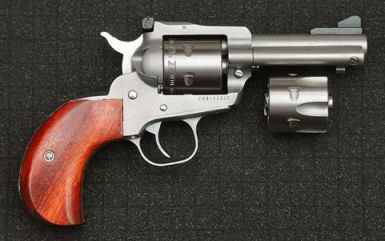
Introduction
I recently converted a Ruger Single-Six into a trail gun
(refer to my article
Building the Ulitimate .22 Trail Gun). In the
process of dry-firing the gun the firing pin broke. Because
the firing pin on a Single-Six is blocked from protruding
too far it won’t peen the tops of the chambers, so I thought
there wouldn’t be any problem dry firing.
I
purchased this gun in 2003 and it was very rough compared to
a Single-Six I purchased in 1977, so I suspect this gun was
built during a time of high volume production and low
quality, so it didn’t surprise me that the firing pin broke!
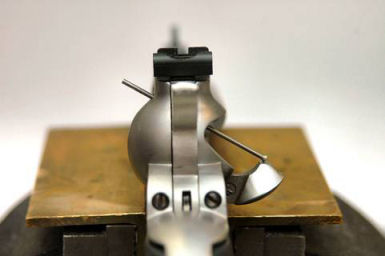
The
firing pin sits in a bushing (Ruger calls this a recoil
shield) that is held in place by a cross pin. The cross pin
is not installed horizontally; it is installed at an angle.
There is a hole in the loading gate notch in the frame; this
is one end of the cross pin. The other end of the pin is
blended with the frame so it is difficult to see. First I
took a prick punch and marked the position of the recoil
shield in the cylinder frame. This was so I could get the
recoil shield rotated correctly when replacing it in the
frame. Then I took a punch and drove out the cross pin from
the hole in the loading gate notch through the frame.

I
completely disassembled the gun and tried to drive the
recoil shield out of the cylinder frame by applying a punch
to the rear of the broken firing pin, but all I succeeding
in doing was peening the frame so the firing pin wouldn’t
move anymore. I poured some Kroil oil into the firing pin
hole to loosen up the recoil shield and waited a couple of
hours. After soaking I used a heavy ball-peen hammer to
strike the punch and the recoil shield came right out.
After I removed the recoil shield I took a proper size drill
bit and reamed the firing pin hole in the frame. This
removed any burrs left by the punch.

I ordered
two spare firing pins from Brownells
#780-001-132 just in case I broke another one. When the
parts arrived I reassembled the firing pin, rebound spring,
and recoil shield and started them into the hole in the
frame. I lined up the two marks I made with the prick punch
and inserted a brass rod through the bore so it touched the
front of the recoil shield.
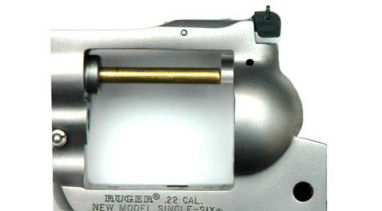
Because
this was a .22 the recoil shield was not directly in line
with the bore so my brass rod only touched the bottom of the
recoil shield as shown in the above photo. Tapping on the
brass rod caused the recoil shield to become tilted. I took
a brass punch and also tapped on either side of the recoil
shield to ensure it was being seated straight. I continued
tapping the bottom and sides until the recoil shield was
back into position, then inserted the cross pin into the
hole in the loading gate notch. Even though the cross pin
was originally flush with the frame, I left it sunk a bit
below the surface. I applied a drop of oil to the front and
rear of the firing pin to ensure the parts were sufficiently
lubricated.
I took a
400-grit polishing stone and polished the front of the
recoil shield and frame to ensure these surfaces were flush
and smooth. This was to ensure the cylinder would rotate
freely with no binding. Now my trail gun is back in
service, but I probably won’t be dry-firing it very much!
By the way, this is the same process for pretty much any
Ruger single-action revolver.
|
