The Marlin Lever Action Cycle
by Roy
Seifert
Click here to purchase a CD with this and
all Kitchen Table Gunsmith Articles.
Disclaimer: This
article is for entertainment only and is not to be used in lieu of a
qualified gunsmith. Please
defer all firearms work to a qualified gunsmith.
Any loads mentioned in this article are my loads for my
guns and have been carefully worked up using established guidelines and
special tools. The
author assumes no responsibility or liability for use of these loads,
or use or misuse of this article.
Please note that I am not a
professional gunsmith, just a shooting enthusiast and hobbyist, as well
as a tinkerer. This
article explains work that I performed to my guns without the
assistance of a qualified gunsmith.
Some procedures described in this
article require special tools and cannot/should not be performed
without them.
Warning: Disassembling
and tinkering with your firearm may void the warranty.
I claim no responsibility for use
or misuse of this article. Again,
this article is for entertainment purposes only!
Tools
and firearms are the trademark/service mark or registered trademark of
their respective manufacturers. Click on any
blue text to go to a
product/seller web site.
Introduction
Ever since getting into Cowboy Action Shooting, I
have been totally infatuated with lever-action rifles.
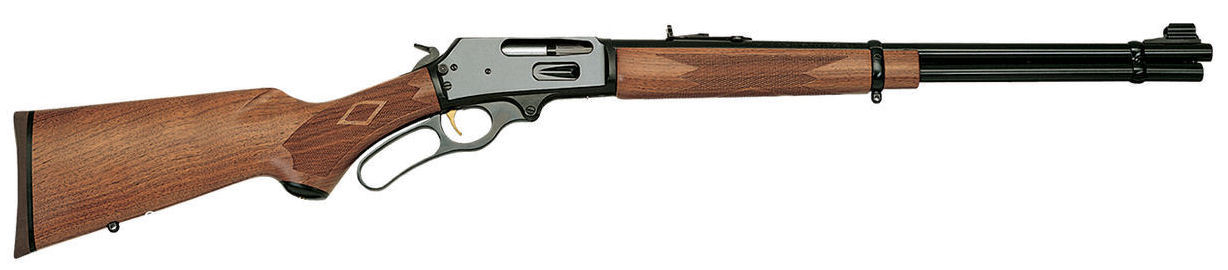
I have several Marlins in my collection: an
1894 CB in .45 Colt, an 1895 CB in .45-70, a 336 in .30-30, and a 39A in .22
S/L/LR. All but the 39a have the
same action. The 336 and 1895 have
an internal round bolt, and the 1894 has an external “square” bolt.
The round bolt receivers are stronger because the rear of the receiver is
closed, whereas the square bolt receivers are open in the rear to allow the bolt
to cycle.
There
have been many comments in the gun forums about how this action functions, some
of which disagreed with each other.
So, I decided to find out for myself how this action worked.
This way I could see what areas I needed to polish and be able to
troubleshoot any problem that may arise.
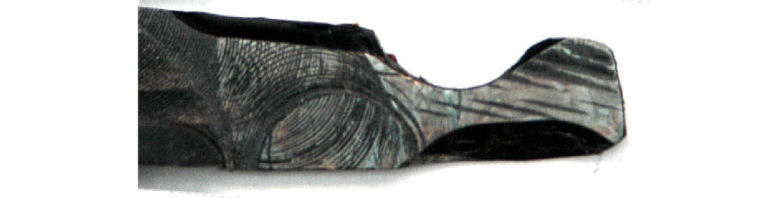
The
photos in this article are for my 336, but the description of the cycle applies
to most, if not all, big-bore Marlin lever-action rifles.
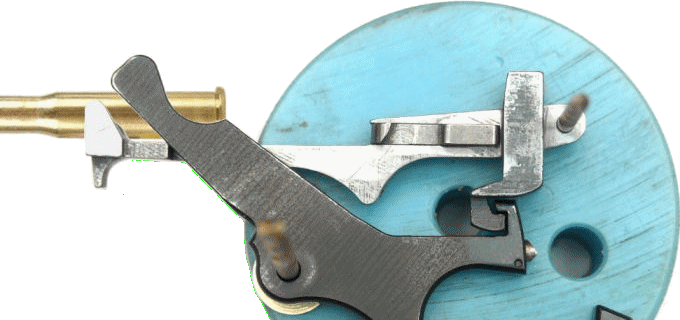
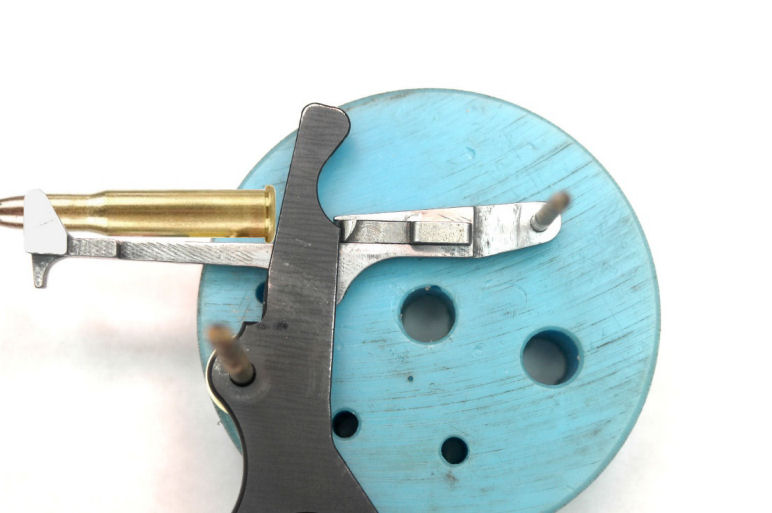
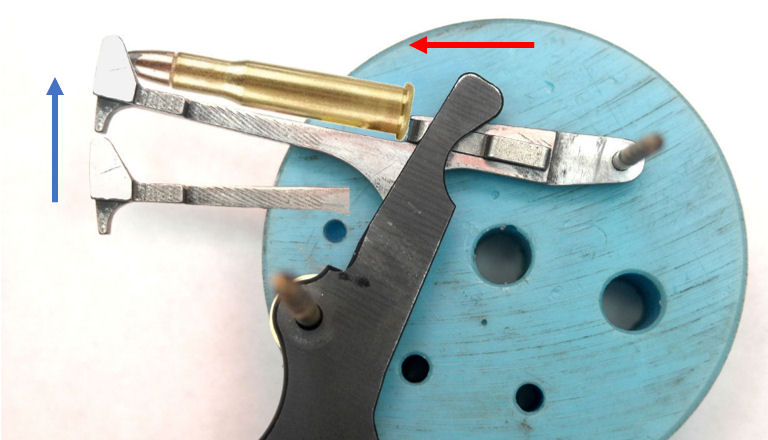
It is difficult to see how the parts interact when installed in the
rifle, so I drilled two holes the proper distance apart in a bench block to
mount the carrier and lever.

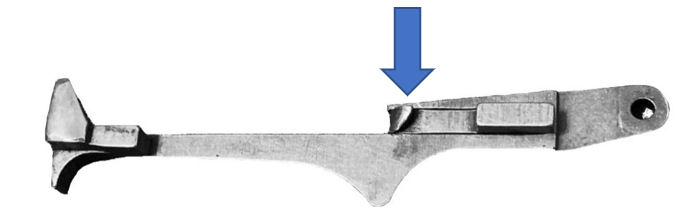
There
are two different types of levers depending on when the rifle was built.
A pre-1985 lever is flat with two large bevels on the right side.
The 1985 and later lever has a large slot milled on the right side with
two small bevels. I’ve tested both
in my 1976 336 and they both seem to function properly but using a 1985 lever in
a pre-1985 rifle should be checked and installed by a competent gunsmith.
Carrier Rocker
The
carrier rocker sits in a groove milled into the carrier and rotates on a pivot
pin. There is a small spring
underneath the rocker to hold it out and against the lever.
Target Suite has an excellent YouTube video on how the lever and carrier
interact.
https://www.youtube.com/watch?v=nWVUaa3iAcM
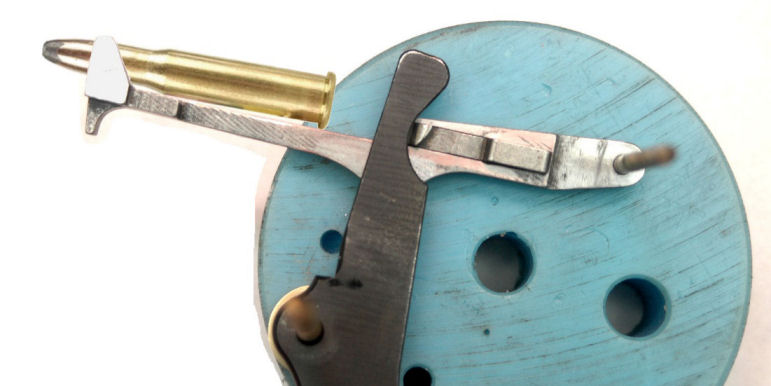
The
hook on the end of the rocker causes the carrier to move up so the bolt can feed
a cartridge from the carrier into the chamber.
The rocker pivots so the lever can slide over the hook when the action is
opened.
There
are two lips or ledges on the carrier; the lip on top where the rocker rides
prevents the cartridge from traveling any farther onto the carrier, and the
front edge of the lever presses against the lip on the front left to force the
carrier down at the end of the feed cycle.
The
Action Cycle
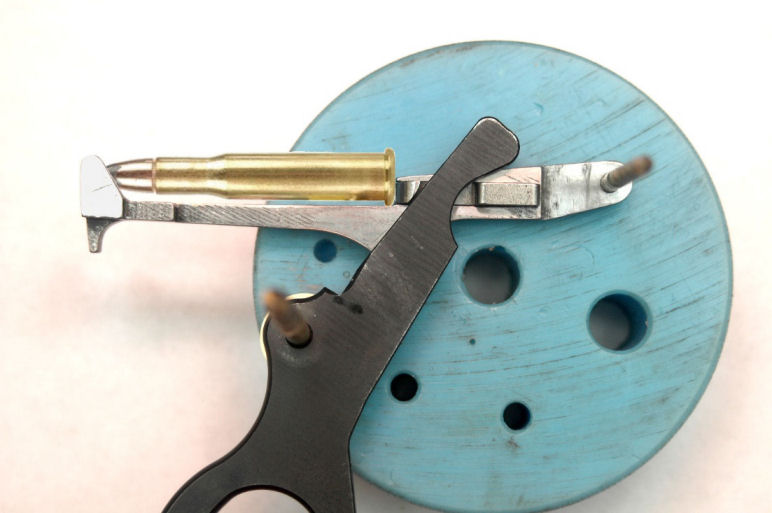
The four main parts that control the feeding of the cartridge from the magazine
tube to the chamber are the lever, carrier, bolt, and loading gate.
Yes, the loading gate serves an important function.
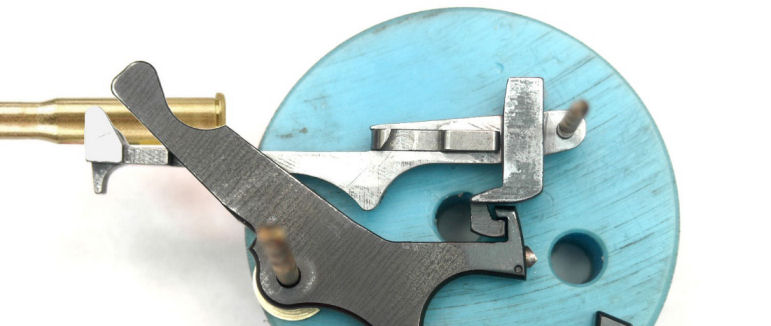
With
the lever closed, the front edge of the lever holds the carrier down, the bolt
is closed, the bolt lock is up and held in place, and the top of the lever and
bolt lock keep the bolt closed. The
lower bevel of the lever holds the next cartridge rim against the front notch in
the loading gate preventing it from moving further rearward, which facilitates
loading another round through the loading gate.
Without the loading gate in place there is nothing preventing a cartridge
from being pushed out of the magazine tube.
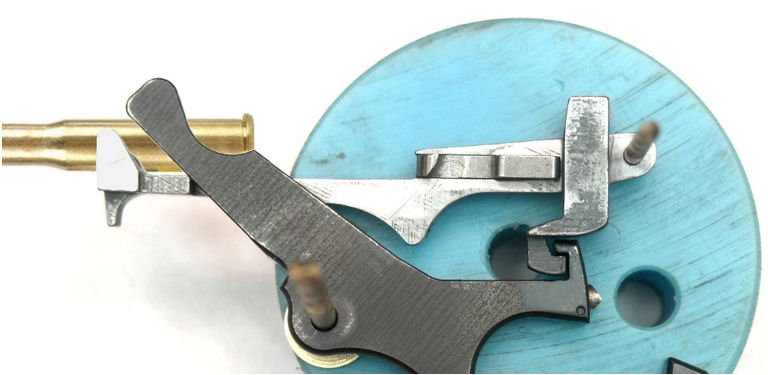
When
the lever is opened, during the first 3/4-inch of travel, the bolt lock is drawn
down from the bolt, the lever is unlocked from the bolt lock, and the cartridge
is allowed to move back onto the carrier.
If the lever is closed at this time, the bolt lock is raised to the
locked position, the hook in the lever is locked into the bolt lock, and the
cartridge is moved forward by the lower bevel on the lever so the rim of the
cartridge is again visible in the front notch of the loading gate.
This permits the magazine tube to be topped up.
As the action is opened, the lever approaches the rocker hook, the bolt
opens and moves to the rear, and the cartridge continues moving onto the carrier
pushed by the magazine spring and controlled by the front edge of the lever.
The cartridge case head rides on the front edge of the lever during the
open half of the cycle.
Towards the end of its travel, the lever rides over the rocker hook which pushes
it down against the spring. When the
lever reaches the fully open position, the spring under the rocker pushes the
rocker out so the hook at the end engages the front of the lever.
A cartridge is now completely on the carrier and is ready to be fed into
the chamber.
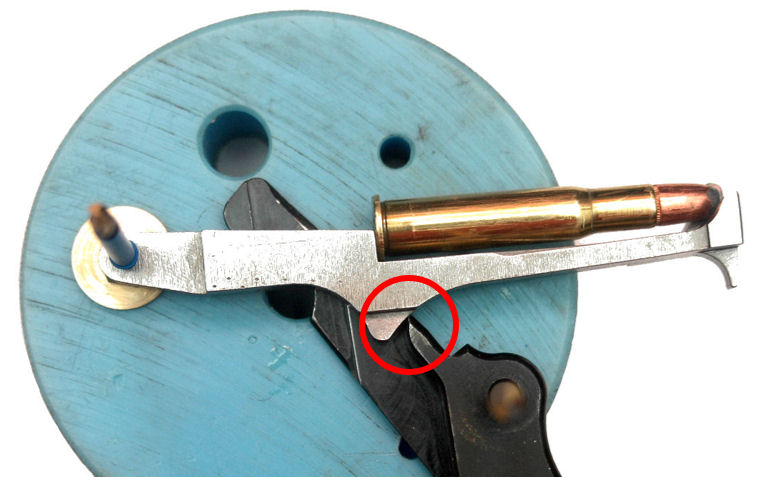
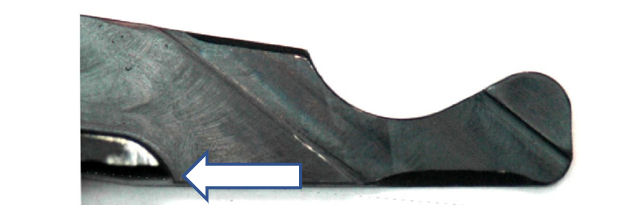
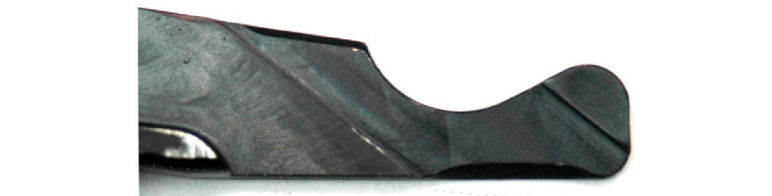
A
small cam on the right side of the lever strikes a lobe on the bottom of the
carrier that moves it up about 1/4-inch to block the next cartridge in the
magazine tube and prevent it from feeding.
If the carrier does not move up to block the next cartridge you can get
the dreaded “Marlin jam”, which is a double feed.
The next cartridge in the magazine tube feeds onto the carrier, but since
there is a cartridge already there, part of the second cartridge is on the
carrier, and part is still in the tube effectively preventing the carrier from
rising and jamming the rifle.
This
can be caused by either a worn cam on the lever, or a notch worn on the bottom
of the carrier by the sharp edge of the cam.
To prevent this from happening, the sharp edge of the cam should be
slightly rounded so it won’t dig a groove in the bottom of the carrier.
If the groove is already there, it can be welded up then filed down, a
hardened shim made from a hacksaw blade can be soldered over the groove or
replace the carrier. If the rifle is
used for hunting and occasional shooting, this problem may never occur.
But an 1894 model used for Cowboy Action
Shooting may see hundreds, if not thousands of rounds.
It’s best to round that edge to prevent the problem from happening.
When
the action is closed, the rear of the carrier rocker hook rides along the front
edge of the lever which causes the carrier to rise.
This aligns the cartridge with the chamber.
As the top of the lever moves forward, it pushes the bolt forward which
begins feeding the cartridge into the chamber.
The cartridge is now under control of the bolt.
The tongue at the bottom of the carrier prevents the next cartridge from
being fed from the magazine tube.
When
the carrier rocker hook reaches the bevel in the bottom of the lever, the lever
slips off and over the hook. By this
time, the cartridge has started into the chamber.
The bolt continues moving forward pushing the cartridge into the chamber.
The next cartridge in the magazine tube prevents the carrier from
falling. If this is the last
cartridge, the carrier is free to fall, but as mentioned before, the cartridge
has already started into the chamber and is under control of the bolt.
The
front of the lever contacts a lip on the front of the carrier and forces the
carrier down if it hasn’t already fallen.
The bolt moves into the closed position and the bolt lock moves up into
the locked position. When the
carrier is pushed down the next cartridge is fed from the magazine tube until it
contacts the bottom bevel on the lever which holds that cartridge in place
against the loading gate ready for the next feed cycle.
Comparing the two levers, it seems that on the 1976 model the carrier rocker
hook rides along the side of the lever until the lever gets into the fully open
position. Then, when the hook
reaches a bevel on the bottom of the lever it is pressed in so it again rides
against the side of the lever. The
bevel on top of the lever depresses the rocker during the opening cycle, and the
bevel at the bottom disengages the hook curing the closing cycle and forces the
cartridge case head against the notch in the loading gate.
The
1985 lever has a channel milled in the side.
During the opening cycle the hook rides it this channel thereby reducing
stress and wear on the hook. Again,
the top bevel depresses the rocker during the opening cycle, and the bottom
bevel disengages the hook during the closing cycle and forces the cartridge case
head against the notch in the loading gate.
The
bottom bevel controls the timing of the carrier; it determines when the rocker
hook disengages from the lever during the closing cycle.
When the hook reaches this bevel, the carrier is free to move down, but
the next cartridge in the magazine tube pressing against the front of the
carrier keeps it up until the front of the lever strikes the lip on the rocker
and forces it down. If the magazine
tube is empty, there is nothing preventing the carrier from falling.
Polishing
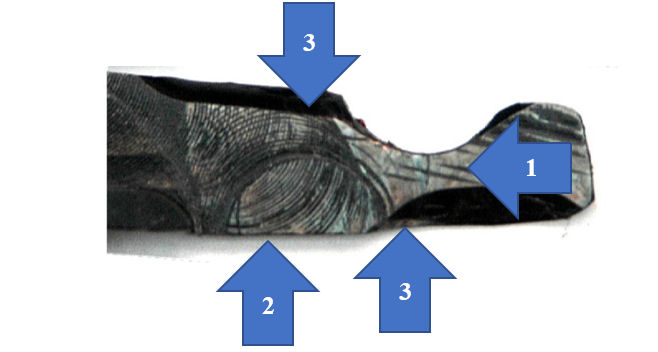
If you
refer to my article
Building a Backpacker “Scout” Rifle you can see what areas
I already polished on my 336. Based
on what I discovered with this article I did a bit more polishing on the lever.
Before polishing I covered all the areas with a blue marker where the
cartridge and/or carrier made contact with the lever so I could see the wear
marks.
1.
I
polished the right side flat with a 220-grit stone to remove the tooling marks,
then finished with a 320-grit stone followed with 600-grit wet/dry sandpaper.
2.
I
polished the bottom edge (where the cartridge head and rocker hook ride) with a
320-grit stone, then finished with 600-grit wet/dry sandpaper.
3.
I
gently polished the bevels with a Cratex bit and my Dremel tool.
After
polishing all the surfaces, I cleaned the exposed bare metal with acetone, then
cold-blued the entire top of the lever with
Brownell’s Oxpho-Blue. I heated
the top of the lever with a heat gun, then applied the Oxpho-Blue with a large
cotton dauber. I kept the metal wet
with the dauber for 60-seconds, then wiped off the excess liquid with a paper
towel. I used 000 steel wool to card
the metal, then finished with a coat of gun oil.
I reinstalled the lever into the rifle and cycled some dummy rounds to
ensure the rifle functioned properly.
Summary
This exercise showed me exactly how the Marlin action works so I could continue
to polish those areas where metal contacted metal.
I did the same exercise for my Ruger Redhawk (refer to my article
Performing an Action
Job on a Ruger Redhawk) so I could see what areas needed polishing for
an action job.
A bench block is a
nice tool to have for this type of work.
You can find them at
MidwayUSA.com,
Brownells, and even on
Amazon. I use my bench blocks for
this type of work, and for removing pins.
I let the pins fall through the holes so I don’t lose them on the floor.
|