Adding Sling Swivels to a Long Arm
by Roy Seifert
Click here to purchase a
CD with this and all Kitchen Table Gunsmith Articles.
Disclaimer:
This article is for entertainment only and is not to
be used in lieu of a qualified gunsmith.
Please defer all firearms work to a qualified
gunsmith. Any loads
mentioned in this article are my loads for my guns and have
been carefully worked up using established guidelines and
special tools. The
author assumes no responsibility or liability for use of
these loads, or use or misuse of this article.
Please note that I am not a professional gunsmith,
just a shooting enthusiast and hobbyist, as well as a
tinkerer. This
article explains work that I performed to my guns without
the assistance of a qualified gunsmith.
Some procedures described in this article require
special tools and cannot/should not be performed without
them.
Warning:
Disassembling and tinkering with your firearm may
void the warranty. I
claim no responsibility for use or misuse of this article.
Again, this article is for entertainment purposes
only!
Tools
and firearms are the trademark/service mark or registered trademark
of their respective manufacturers.
Introduction
A sling is a very convenient method for carrying a rifle
or shotgun through the woods or in a tactical
situation. For hunting the sling allows you to carry
the firearm over your shoulder keeping your hands free
as you move to your favorite hunting spot. Slings have
been used to carry long arms since the long arm was
invented and consisted of everything from strips of
leather or cloth tied around the barrel and stock, to
modern synthetic webbing and quick-disconnect sling
swivels. Personally I prefer the quick-disconnect
models made by
Uncle Mike’s because it is easier to remove the
sling for cleaning and storage, you can purchase them
almost anywhere, and they make styles for almost any
model of rifle or shotgun.
There
are a number of methods for attaching sling swivels to a
long arm. Uncle Mike’s makes a set that attaches to the
magazine tube and butt stock for lever-action rifles.
They also make a set that installs to the front barrel
band and butt stock of a lever-action rifle.
They also
make a set for rifles with wood stocks. Both studs have
wood-screw type threads for threading into a wooden stock.
The shorter stud goes into the fore end, the longer one goes
into the butt stock.

A long
time ago I purchased a Winchester 1300 12-gauge shotgun that
I wanted to use for turkey hunting. I wanted to have the
gun camouflaged, but before sending it out to have that work
done, I wanted to add sling swivels so I could install a
sling. The sling swivel studs would then be camouflaged to
match the rest of the gun.
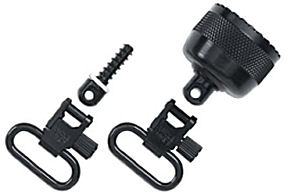
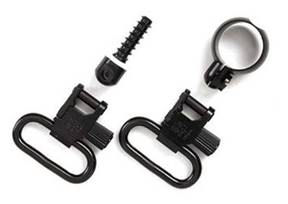
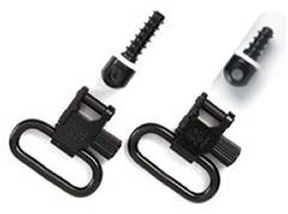
Uncle
Mike’s makes quick-disconnect sling swivels for a number of
different shotgun models, including the Winchester 1300. It
consists of a new magazine cap with a sling swivel stud
installed and a second sling swivel that is installed in the
bottom edge of the butt stock. Installing the new magazine
cap was a simple matter of unscrewing the factory cap and
screwing on the new cap.
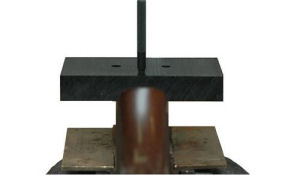
I knew I
would be cutting about two inches off of the stock to adjust
the length of pull for me, so I positioned my homemade
centering tool four inches up from the rear of the butt
stock, leveled the block, then struck the center punch with
a mallet. That left a perfectly centered mark on the bottom
edge of the butt stock.
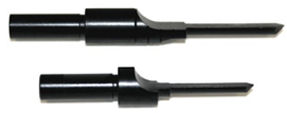
Uncle
Mike’s makes a set of bits to properly drill the correct
holes and counter-sinks, but I don’t really install sling
swivel studs often enough to purchase them, so I decided to
use a wood screw bit.

I put the
stock in my machinist vise with the bottom edge up and
leveled. I adjusted the depth of a #10 wood screw bit to
the length of the threads in the stud. I chucked the bit
into my mill/drill and drilled the hole. I stopped just
when the countersink started to bite into the wood. The
hole was just a bit too small for the threaded stud so I
drilled out the hole with a #18 drill bit. I stopped
drilling when the bit reached the bottom of the hole.
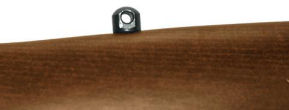
I applied
some soap to the stud threads and used a crescent wrench to
turn the stud into the hole. I stopped turning when the
stud was just below the surface of the stock and the holes
were aligned properly. The stud is nice and tight and ready
to accept the sling swivel. The stud came with a white ring
that I decided not to use since I planned to have the gun
camouflaged.
|