Building
a Folding Gun Cart
by Roy Seifert
Click here to purchase a
CD with this and all Kitchen Table Gunsmith Articles.
Disclaimer:
This article is for entertainment only and is not to
be used in lieu of a qualified gunsmith.
Please defer all firearms work to a qualified
gunsmith. Any loads
mentioned in this article are my loads for my guns and have
been carefully worked up using established guidelines and
special tools. The
author assumes no responsibility or liability for use of
these loads, or use or misuse of this article.
Please note that I am not a professional gunsmith,
just a shooting enthusiast and hobbyist, as well as a
tinkerer. This
article explains work that I performed to my guns without
the assistance of a qualified gunsmith.
Some procedures described in this article require
special tools and cannot/should not be performed without
them.
Warning:
Disassembling and tinkering with your firearm may
void the warranty. I
claim no responsibility for use or misuse of this article.
Again, this article is for entertainment purposes
only!
Tools
and firearms are the trademark/service mark or registered trademark
of their respective manufacturers.

Introduction
As mentioned in my article Installing
a Half-Cock Hammer in an Old Model Ruger® Vaquero® I am getting back into Cowboy
Action Shooting™. One
of the additional items I needed was a gun cart.
The gun cart is used to move long arms, ammo, and other
gear from stage to stage during a match.
I currently have two gun carts; an ugly one I quickly
assembled out of plywood, and a really cool one in the shape
of an outhouse that I won in a shooting match.
I built the plywood cart when I first started shooting
cowboy matches just so I could have something to use.
The outhouse cart I won was very heavy and required two
people to load into and out of my Ford Explorer.
I replaced the Explorer with a little Jeep Wrangler
which doesn’t have enough room in the “tub” for the
outhouse gun cart so I decided to build a new, folding gun
cart.
Requirements
There are as many different designs of gun carts as there are
different cowboy shooters.
The gun cart often matches the character of the shooter
and can be as personal as the shooter’s alias and costume.
Gun carts can range from simple units made from scraps of
whatever you may have laying around to elaborate contraptions
that not only fulfill the needed purpose but are almost an art
form in their own right. I’ve
seen simple frames made of wood and/or PVC pipe, modified golf
carts, and very elaborate buckboards, covered wagons and stage
coaches. Because
of space, weight, and budgetary considerations, my new gun
cart had to meet the following requirements:
- Fold
up flat for easy storage and transportation
- Light
weight to easily lift into and out of the Jeep
- Fit
into a 36”-wide horizontal space when folded - this is
the distance between the wheel wells in the tub of my Jeep
- Carry
4 long arms and a range bag/box when unfolded - I only use
one rifle and one shotgun at a time, but sometimes I have
a friend come along so it’s good to be able to carry two
extra long arms. Or
if there is a long-range side match I have a .45-70 rifle
I may want to bring along.
Also, under SASS rules, firearms must be
transported safely so their muzzles never sweep
contestants or bystanders.
Typically this means long guns, i.e. rifles and
shotguns are transported with their actions open and
muzzles pointed up.
- Be
at least 40-inches high when unfolded - this will make it
easy to move around. My
arms are 40” above the ground with my forearms extended
at right-angles from my body and parallel to the ground.
Construction
I’m no Norm Abrams and my woodworking tools and skills are
rudimentary at best. I
already had all the power and hand tools I needed for this
project so I didn’t need to purchase any additional tools.
If you are
an advanced woodworker you may find the photos and
descriptions very elementary; you can probably work just from
the plans. If you
are an amateur like me, hopefully you will find this article
helpful. You will
find full-size plans and a materials list at the end of this
article.
Before we
get started you need to know that not all 1” x 4” wood is
the same. First of
all I purchased “select” pine because it was clear and had
no knots. Also,
most of the boards I selected were straight.
If you’ve ever tried to find 8-foot boards that
weren’t bent or bowed, you know what I mean.
I purchased
from both Lowes and Home Depot since I have both of those
home-improvement stores close to my home.
1” x 4” actually measures 3/4“ x 3 1/2“.
It turned out that the wood I purchased from Lowes
measured 13/16” thick so the cross pieces for my rabbets
were thicker than the rabbet joint by 1/16”!
The wood from Home Depot measured exactly 3/4“ x 3
1/2“ so I should have used only Home Depot wood.
Unfortunately, Lowes was on the way home from somewhere
so I stopped there to buy my wood.
I should have measured first and checked both stores
before buying. The
advantage of the thicker wood is that all of my dado joints
were very tight which means my box and frame are very sturdy.
Lesson learned!!!
Cutting
the Pieces
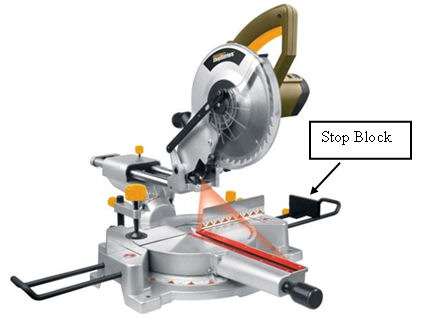
I used my
compound miter saw to cut all the pieces I needed from three
1”x4”x8’ select pine boards.
You can also use a miter box and miter saw to cut the
pieces, but you want to make sure the cuts are square and of
the same length. My
miter saw has a stop block I can adjust so when cutting
multiple pieces of the same size I only had to measure the
first one, then used the stop block to ensure all the other
pieces were cut identically.
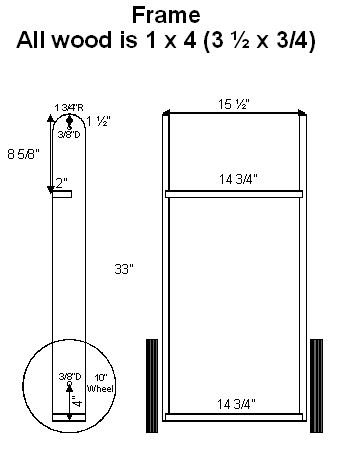
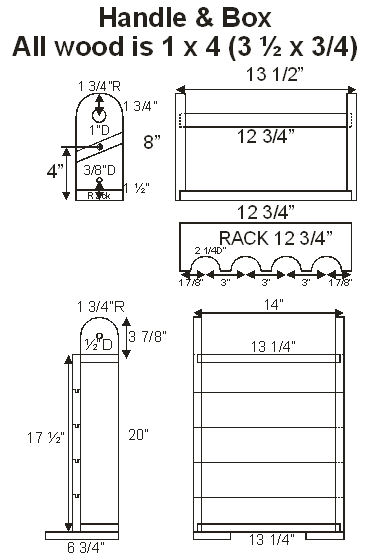
I cut the following pieces:
2
@ 33” – frame sides
2
@ 20” – box sides
2
@ 14 3/4“, one ripped to 2” wide – frame supports
5
@ 14” – box bottom
2
@ 13 1/4“ – box supports
1
@ 12 3/4” – handle support
2
@ 12 3/4” – shelf
2
@ 8” – handle sides
2
@ 6 3/4“ – front legs
I ripped
one of the 14 3/4“ boards to 2” wide; this was the top
support piece for the frame.
It had to be narrower in width so the guns wouldn’t
it the front edge when setting in the rack cutouts.
I also cut a 12 3/4” length from the 1” dowel which
became the hand bar. Refer
to the plans and materials list at the end of this article.
Routing
the Rabbets and Dados
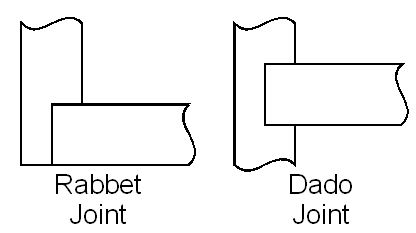
I wanted
the frame, handle, and box to be sturdy so I used rabbet and
dado joints to hold the cross pieces in place.
A rabbet is a channel cut into the end of a piece of
wood, a dado is a channel cut into the middle of a piece of
wood; each is designed to hold a cross piece.
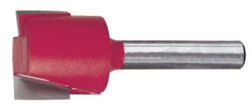
Since the
wood was 3/4“ thick I used a 3/4“ square router bit to cut
the rabbets in the ends, and dados at the proper locations of
the frame, handle, and box sides.
Each rabbet and dado cut was 3/8” deep; half the
thickness of the wood.
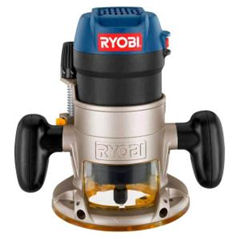
The
distance from the center of the router bit to the outer edge
of my router base is 3-inches.
For each rabbet cut I drew a line with a pencil 3
3/8” up from where I wanted to cut and placed a piece of
scrap wood against that line.
3” up from the end of the wood would be the center of
the 3/4“ bit so I had to move the line 3/8” farther up so
the edge of the bit would be even with the bottom edge of the
wood. I squared
the scrap wood with a T-square and clamped it place with C
clamps. This piece
of wood acted as a straight edge to guide the router.
Note:
I always mark wood with a pencil and make light marks.
These marks are easy to remove by sanding.
Ink pens and felt-tip markers seep into the fibers of
the wood and are difficult to remove.
For each
dado cut I only had to mark 3” up from the location of the
dado because the plans show the center of the dado rather than
the edge.
Next I used
a 1” wood bore to cut the holes for the round hand bar.
I cut each hole 3/8” deep.
Routing
the Tongue and Groove Joints

The bottom
of the box is made up of 5 pieces, each piece is 3 1/2“ x
14”, but held together with tongue and groove joints.
I didn’t want to spend the $80+ dollars for a tongue
and groove router bit set, so I cut my own.
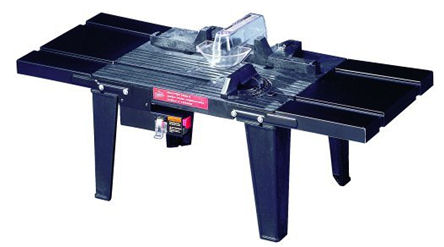
I attached my router to my router table and set the
depth of the 3/4“ bit to cut a 1/4“ x 1/4“ groove.
I cut this groove on both sides of the edge of a board
leaving a 1/4“ tongue in the middle of the edge.

I replaced
the 3/4“ bit with a 1/4“ square end bit and adjusted my
router table to cut a 1/4“ x 1/4“ groove down the middle
of one edge of a board. This
cut the groove which mated with the tongue of the opposite
board. One
end-board had one tongue and one plain edge, the other
end-board had one grooved and one plain edge.
The plain edge is the outside edge of the bottom of the
box.
Drilling
the Holes
I wanted to make sure all holes were straight so I used a
drill press to drill the holes.
I drilled 3/8” holes in the handle and frame for the
carriage bolts that would hold the handle in place, and 1/2“
holes in the frame and box for the wheels hex-head bolts that
would hold the wheels and box in place.
I marked
the locations for all the wallboard screws 3/8” in from the
edge of the wood and drilled all the holes using a 3/32”
drill bit. I
countersunk each hole using a countersink bit so the screw
heads would set flush with the surface of the wood.
I did not drill the matching holes in joining pieces of
wood until final assembly.
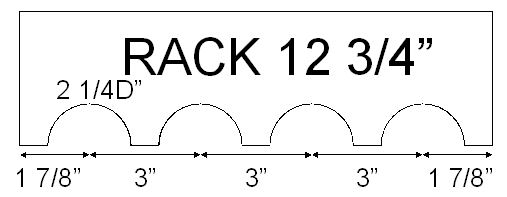
I used a 2
1/4“ hole saw to cut four half-holes in the rack.
These are used to support the guns.
Finishing
the Wood
I used a 3
1/2“ circle as a template and traced around the tops of the
frame and handle sides since I wanted to radius them.
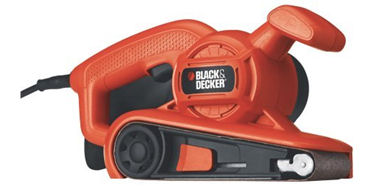
I used an 80-grit sanding belt and my belt sander to
sand the radius. I
chucked the sander upside down in my bench vise and sanded the
radius by hand.
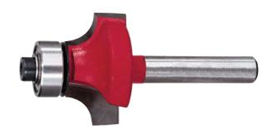
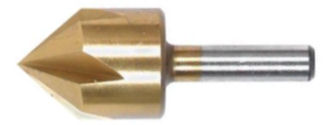
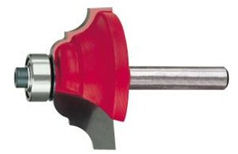
I used a
1/4“ rounding over router bit to round all the sharp edges
of the wood. I
then sanded each piece of wood using 120-grit sand paper.
For the boards I used my belt sander and a 120-grit
sanding belt.
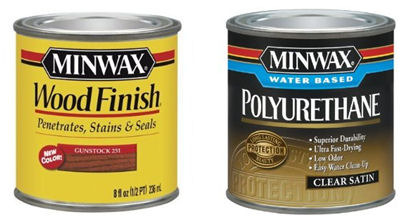
I stained
each piece of wood with Minwax®
#231 Gunstock, then finished with Minwax®
Fast Drying Clear Satin Polyurethane.
I applied two coats of polyurethane and sanded with
400-grit sand paper between coats.
Assembly

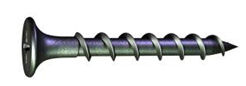
I used a
corner clamp to assemble the frame, handle, and box.
The rabbets, dados, and corner clamp ensured each
assembly was square. Once
each piece of wood was in place I used a 3/32” drill bit to
finish drilling the holes and assembled with #6 x 1 1/4“
coarse black wall board screws.
I live in the south and southern pine is so soft that
regular wood screws strip out of their holes very easily so I
use wall board screws instead.
I decided not to glue the joints in place in case I had
to disassemble the cart to make modifications, which I did as
you will see later.
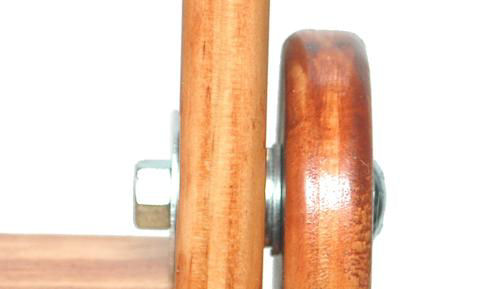
I put two
3/8” washers between the frame and handle to act as spacers
to keep the handle centered.
I used a 3/8” fender washer and a nut to secure the
3/8” carriage bolt which holds the handle to the frame.
Since I didn’t want to over-tighten the nuts I used
Loctite® blue on the threads to secure the nuts in place.
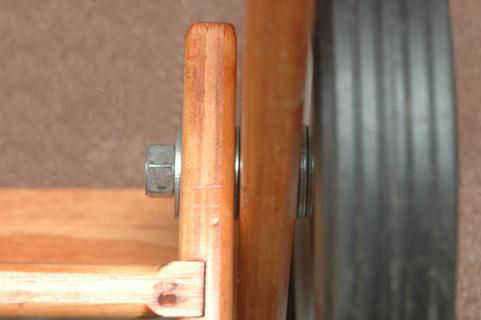
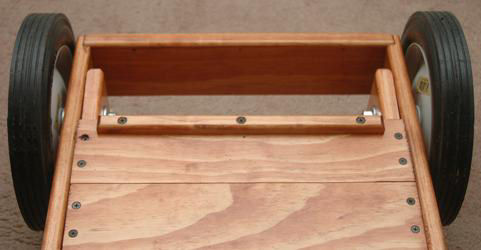
I used
three 1/2“ flat washers as spacers to keep each wheel away
from the frame, and an additional 1/2“ washer between the
box and frame to also act as a spacer.
I used a 1/2“ fender washer and two 1/2“ nuts to
secure the 1/2“ hex-head bolt that holds each wheel and box
to the frame. I
used two 1/2“ nuts and tightened them together very tight in
a “jam nut” configuration so they wouldn’t back out.
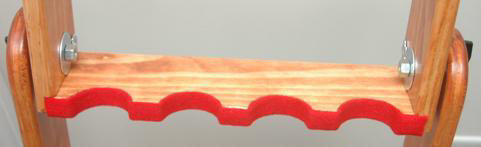
I cut a
strip of red felt 3/4” x 20” and used contact cement to
glue it to the front of the rack.
The felt will protect the finish of the guns.
When the
handle is in the unfolded position it is rotated about
10-degrees to the rear. This
allows the rack to be positioned a little bit forward, and the
round hand bar to be positioned a little bit to the rear so
the guns don’t interfere with my hands when moving the cart.
I rotated the handle to the proper position and drilled
a 1/4“ hole through each side of the frame and handle to
prevent the handle from rotating.
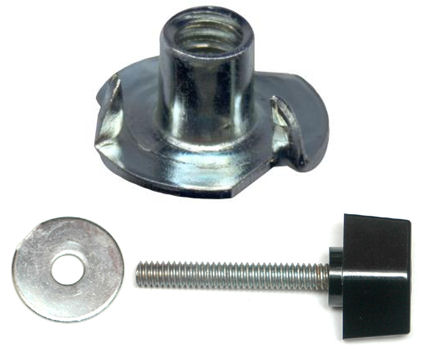
I installed a 1/4-20 T-nut through the hole on the
inside of the handle. I
purchased a 12” piece of 1/4-20 threaded rod and cut two 2
1/2“sections. I
used some Loctite® red (the permanent stuff) to glue a
plastic 1/4-20 T-knob onto one end of the threaded rod.
With the handle rotated up in place I insert the
threaded rods through the holes in the frame and handle and
screw them to the T-nuts to hold the handle in place during
use.
I also
drilled a 1/4“ hole through each side of the box and frame
with the box folded into the frame.
I insert the threaded rods through these holes to keep
the box folded in place during transport in my Jeep.
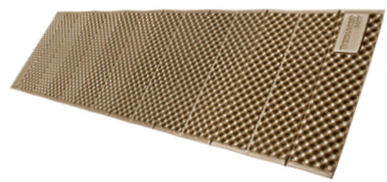
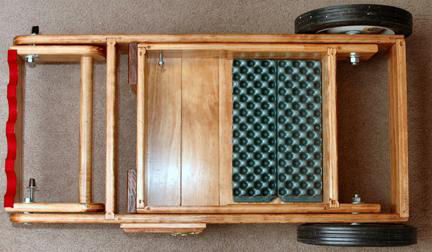
My wife
found a Therm-A-Rest® Z Lite™ pad for about $0.99 at our
local Goodwill outlet. They
normally retail for about $40!
I cut a piece out of this pad and glued it to the
bottom of the box to rest the butts of the long arms.
This pad is soft so it won’t mar the finish on the
guns, and the egg-crate pattern prevents the guns from moving.
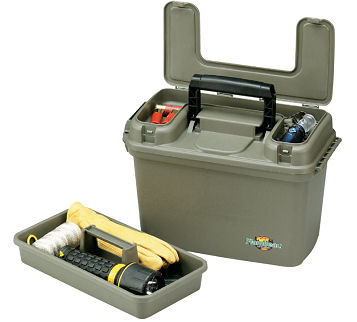
To finish
my gun cart I purchased a Flambeau Dry Box at Walmart which
comes with a storage compartment in the lid and a removable
tray. I will use
the lid to store small items like ear plugs and cleaning
supplies, the removable tray I’ll use to store my timer,
shooting glasses, tools, and other gear, and the box itself
will hold ammo, and other larger items.
Modifications
After the cart was assembled everything worked as it should.
It folded into a neat package that fit into my Jeep,
and was lightweight and easy to carry.
I did have to make a few modifications to improve the
overall function.
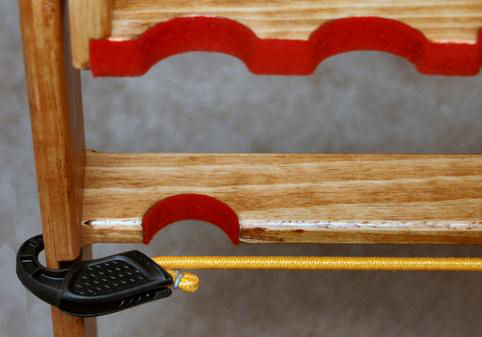
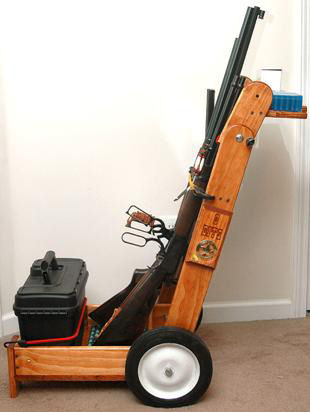
Modification
#1: Double-Barrel
Shotgun – The shotgun breaks open at such an acute angle
that the top of the barrel was hitting the 2” cross brace on
the frame. I cut a
2 1/4“ half-hole notch out of the cross brace, stained and
finished it with polyurethane, and covered it with red felt
like the rest of the rack.
Now the shotgun sets securely in its own rack, which it
didn’t before. The
yellow bungee cord you see in the above photo holds the guns
in place while moving over rough ground.
Modification
#2: Dry Box –
The dry box fit very tightly in the box which would eventually
cause the finish to wear and possibly the wood to bow out.
I used my router and 3/4“ router bit to relieve
1/8” from the inside of each box rail just where the dry-box
set. I stained and
finished each relief cut as before; now the dry-box doesn’t
touch the sides of the bottom of the gun cart.
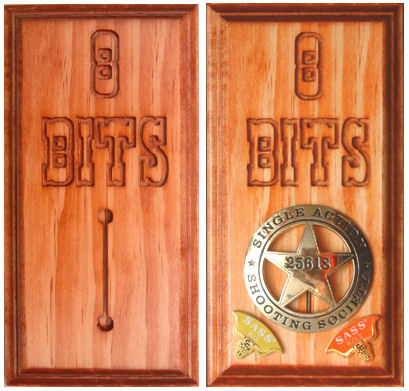
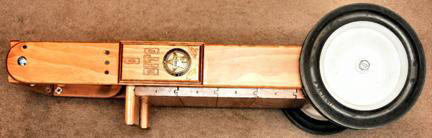
Modification
#3: Personalized
Plaque – I wanted to personalize my gun cart by mounting a
plaque with my alias and SASS badges.
I cut a piece of wood 7” long and used my router
table and a 1/2“ cove and bead bit to put a nice edge on it.
Then I used
CorelDRAW®, my CAD/CAM
software BobCAD-CAM v20
and my MAXNC
10 CL CNC hobby mill to engrave my alias and a notch for
my membership badge. I
stained and finished the plaque to match the rest of the gun
cart.
I used
clear silicon RTV to mount my badge and Range Officer (RO) I
and II pins onto the plaque.
I mounted the plaque on one of the frame uprights by
drilling and countersinking holes on the inside
of the frame. That
way screw heads wouldn’t show on the plaque.
The RO I
and II pins came with two pins on the back for attaching to
clothing. I
pressed each pin into the wood at the proper location; this
left two marks from the rear pins.
I used a small drill bit to drill where the pins left
marks. This
allowed the pins to set into those holes to keep them in
place. I again
used clear RTV on the backs of the pins to hold them in place.
Modification
#4: Reduce Angle
of Frame – After I put everything together I discovered that
the frame leaned back too far.
The weight of four guns would cause the cart to tip
backwards even if the dry-box was full of ammo.
Eventually as I used ammo the dry box would get lighter
and the cart would fall backwards.
I cut a piece of wood 1/2“ x 3/4“, stained and
finished it, then mounted it on the bottom of the box.
This reduced the angle of the frame so when filled with
guns it wouldn’t have a tendency to tip over.
Modification
#5: Build a Shelf
– I didn’t want to have to bend over all the time to get
ammo out of the box to fill my loading strip so I built a
shelf into the handle on which I can set cartridge and shot
shell boxes. Because
the handle and frame both tip backwards I had to rout dado
channels into the handle sides at an angle.
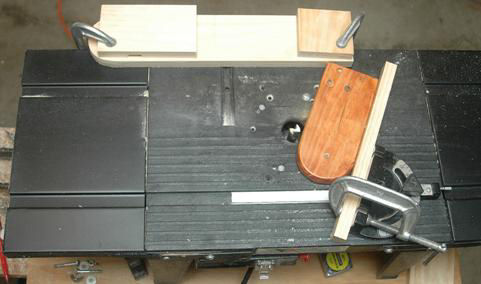
I set up my
table saw miter gauge to 67 1/2 degrees and clamped on a piece
of wood as an extension. I
installed a 3/4“ square router bit 3/8” above the surface
of the table. I
clamped a piece of wood on the edge of the router table to act
as a straight edge so the center of the dado would be four
inches up from the bottom cut the angled dado.
I tried routing the dado without the straight edge
guide and all I succeeded in making was a curved dado cut,
which proved to me that I needed the guide.

I rotated
the miter gauge to 67 1/2 degrees on the other side of the
90-degree mark and cut the opposite angle on the other handle
side. I drilled
holes, counter-sunk, stained and finished each side as before.
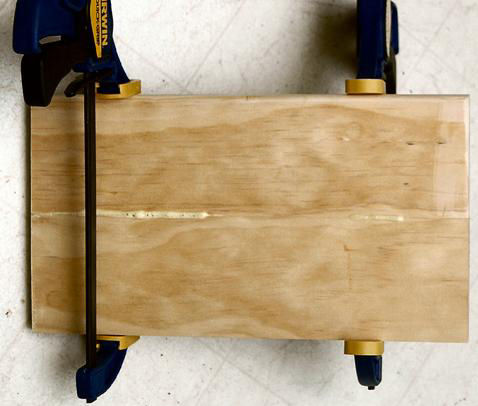
To form the
shelf, I cut two leftover pieces of wood 12 3/4“ long,
drilled holes in one side, and used 1/4“ dowel pins and
Gorilla Glue® and clamped the two pieces together.
I scraped off the excess glue, sanded, stained, and
finished as before.

Once the
shelf was completed I assembled the handle so the shelf was 2
1/4“ back from the front edge.
This prevents the guns from hitting the front edge, and
provides a little more shelf space.
I also discovered that if I left cartridge boxes on the
shelf while moving the cart, they would slip off.
I added a 3/4“ x 3/4“ strip of wood to the rear
edge of the shelf to prevent this from happening.
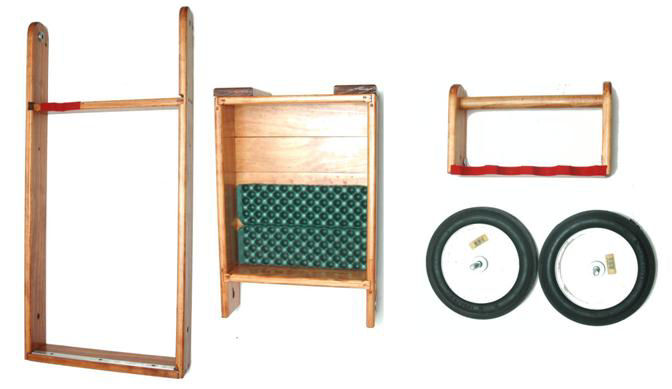
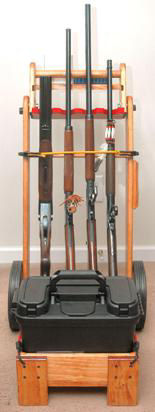
Below are
photos of the completed project.
Woodworking is just as much a part of gunsmithing as is
metal working. No
only does my gun cart look nice and function as designed, it
should last me for many years.
Plans
Materials
List
|
Qty
|
Description
|
|
3
|
1”
x 4” x 8’ select pine or other wood of your choice
|
|
1
|
1“
x 24” wood dowel
|
|
2
|
3/8”
x 2” carriage bolts
|
|
4
|
3/8”
flat washer, these act as spacers between the frame and
handle
|
|
2
|
3/8”
fender washer
|
|
2
|
3/8”
nut
|
|
1
|
Loctite
blue, tube
|
|
1
|
Loctite
red, tube
|
|
2
|
10”
x 1.75” hard rubber wheels
|
|
2
|
1/2“
x 4” hex-head bolt
|
|
4
|
1/2“
nut
|
|
10
|
1/2“
flat washer, these act as spacers between the wheels and
frame, and frame and box
|
|
2
|
1/4“
T-nut
|
|
1
|
1/4“–20
x 12” threaded rod
|
|
2
|
1/4“
T-knob
|
|
2
|
1/4“
fender washer
|
|
2
|
3/4”
x 12” aluminum strip
|
|
1 box
|
6 x 1
1/4“ coarse black wall board screws.
I live in the south and southern pine is so soft
regular wood screws strip out of their holes too easily
so I use wall board screws instead.
|
|
1
|
3/4”
x 20” felt strip
|
|
1
|
Stain,
small can, color of your choice, I chose Gunstock since
I like the red color
|
|
1
|
Polyurethane,
small can, finish of your choice, I chose satin since I
didn’t want a gloss finish
|
|
