Fire
Lapping a Barrel
by Roy Seifert
Click here to purchase a
CD with this and all Kitchen Table Gunsmith Articles.
Disclaimer:
This article is for entertainment only and is not to
be used in lieu of a qualified gunsmith.
Please defer all firearms work to a qualified
gunsmith. Any loads
mentioned in this article are my loads for my guns and have
been carefully worked up using established guidelines and
special tools. The
author assumes no responsibility or liability for use of
these loads, or use or misuse of this article.
Please note that I am not a professional gunsmith,
just a shooting enthusiast and hobbyist, as well as a
tinkerer. This
article explains work that I performed to my guns without
the assistance of a qualified gunsmith.
Some procedures described in this article require
special tools and cannot/should not be performed without
them.
Warning:
Disassembling and tinkering with your firearm may
void the warranty. I
claim no responsibility for use or misuse of this article.
Again, this article is for entertainment purposes
only!
Tools
and firearms are the trademark/service mark or registered trademark
of their respective manufacturers.
Factory
rifled barrels are truly a wonder of modern manufacturing.
However, the manufacturing process often leaves the
bore rough. Pits
and burrs in the bore, although unseen by the naked eye, can
cause the barrel to foul after only a few shots, and can
affect accuracy.
There are
a number of ways to smooth the bore of a barrel:
- Shoot
the gun a lot – Although this method does work, it is
very inconsistent and does not always produce the
desired results.
- Hand
lap the barrel – This involves removing the barrel
from the receiver, producing a lead lap that fits the
bore, impregnating the lap with lapping compound, and
moving the impregnated lap through the bore.
- Polish
with a tight patch and fine abrasive compounds – It is
possible to polish a barrel using fine abrasive
compounds such as Remington Bore Cleaner or USP Bore
Paste. The
compound is applied to a tight fitting patch and run
back and forth through the bore.
This method works, but takes a very long time to
produce any positive results. (This method can be
accelerated with very positive results; see the addendum
at the end of this article.)
- Fire
lap the barrel – This is probably the easiest method
of all for polishing a bore.
Fire lapping involves imbedding different grits of lapping
compound into bullets and firing them down the barrel at a
very moderate velocity.
I use lead bullets for handguns, and copper-jacketed
bullets for rifles. The
fire lapping process accomplishes a number of positive
things:
- Smoothes
the barrel and removes pits and burrs
- Removes
tight spots
- Slightly
tapers the barrel from forcing cone to muzzle.
This taper keeps the bullet tightly sealed
against the lands and grooves as it travels down the
bore.
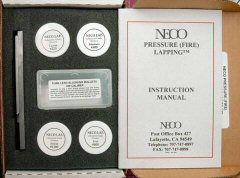
I purchased
a fire-lapping kit from NECO,
which included 4 grits of lapping compound, 220, 400, 800, and
1200. Their
instruction manual said to use lead bullets to fire-lap a
revolver barrel, and shoot multiple exact full cylinders of
bullets. (This is
so each chamber throat in the cylinder gets the same amount of
polishing.) They
recommended 12 rounds with 220 grit, 18 rounds with 400 grit,
and 24 rounds with 800 grit.
They did not recommend using the 1200 grit but they
stated it couldn’t hurt.
For rifle
barrels, they recommend firing five rounds of each grit,
cleaning the barrel, then slugging it to gauge the progress.
I prefer NECO’s other recommendation of shooting ten
rounds of each grit and cleaning the barrel after every five
rounds. It is
important to thoroughly clean a revolver barrel after every
full cylinder of shots, and to clean a rifle barrel after
every five shots to remove the powder residue and fouling.
Otherwise, I would be lapping the fouling and not the
barrel.
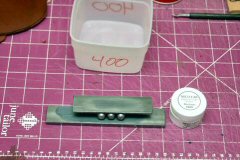
I spread a
thin layer of compound on the steel plate provided in the NECO
kit and rolled three bullets at a time between it and another
steel plate thereby impregnating the bullets.
I wiped off the excess compound from each bullet and
separated them by grit in preparation for loading.

A properly
impregnated bullet has a gray ring around the bearing surface.
This surface provides the lapping action as the bullet
travels down the bore. I
loaded each round with a light load of Red Dot, which produced
a low velocity load. I
normally destroy the cases after using them for fire lapping.
If I was to reload these cases, residual lapping
compound could contaminate the bullet, which would damage the
barrel. However,
because I plan to fire lap more then one gun of the same
caliber, I can re-use the cases, but I have to keep them
separated by grit.
Ok, off to
the range. As
mentioned before, I need to thoroughly clean the barrel after
every full cylinder for a revolver, and after every five shots
with a rifle.
So, what
about the results, and just how effective is fire lapping for
improving accuracy? First
of all, a fire lapped barrel is much easier to clean.
Because pits and burrs are removed, there is nothing to
hold fouling. In
most cases, a fire lapped barrel will come clean after only
two or three solvent-soaked patches.
I have a
Chinese Polytech M1A with which I could barely keep the shots
in a six-inch dinner plate at 100 yards.
I figured the barrel was rough built and could probably
be improved by fire lapping.
After fire lapping the barrel and cleaning up the
muzzle with a brass muzzle lap, I was consistently shooting
2-inch walnut husks at 100 yards.
On paper, I was printing sub minute-of-angle groups.
“Your results may vary”, as the disclaimers say,
but I was quite stunned by the results.
I would not
fire lap a custom-made barrel because those are usually
hand-lapped at the factory.
NECO recommends that the 220-grit lapping compound
should not be used in good quality factory barrels.
I did use the 220-grit on my Chinese M1A barrel because
I could see it was very rough inside.
I do not
fire lap every gun I own because most of them shoot great
right out of the box. However,
if I have a revolver that has a constriction in the barrel
where it is screwed into the frame, or a poor-quality barrel,
I will fire lap it. Fire
lapping will NOT restore a worn or shot-out barrel such as you
might find on a military surplus weapon, and it may not
improve the accuracy of an already accurate barrel, but it
will make the bore smoother and easier to clean.
Addendum
I found an interesting article online at the Twin City Rod
and Gun web site that provided a process for hand-lapping a
barrel using three different grits of cleaning compound and
tight patches. Fire-lapping involves shooting a bullet
impregnated with lapping compound down the bore at a much
reduced velocity and pressure. This has the effect of both
polishing and tapering the bore for maximum accuracy, but it
can also open and lengthen the throat. I found an article on
the Los Angeles Silhouette Club web site written by Ken
Mollohan that has a little different method for fire-lapping.
Ken first ran a bore mop impregnated with J-B® Bore Cleaning
Compound through the bore being careful not to get any
compound in the chamber, then fired a low velocity, low
pressure jacketed round through the bore. He repeated this
process 5 or 6 times, then thoroughly cleaned the barrel. This
process not only provided all the benefits of fire-lapping,
but it prevented damage to the throat, and since the bullet
itself was not impregnated with the lapping compound, the
cartridge cases did not have to be thrown away.

I decided to try a
combination of both methods on a new M1 Garand barrel. First I
loaded 10 rounds of .30-06 with 5.0 grains of Red Dot behind a
150 grain FMJ boat tail .308 bullet and a large rifle magnum
primer. I put an empty case in the chamber and closed the bolt
to prevent compound from getting into the chamber, impregnated
a bore mop with USP Bore
Paste, then ran the mop back and
forth through the entire length of the bore 20 times. This
left a small amount of compound in the bore. I fired one low
velocity round through the barrel, inserted the same empty
case into the chamber that I had used before, then again ran
the impregnated bore mop back and forth through the bore
several times. This cleaned any powder residue and fouling
from the bore and prepared it for a second shot. After
performing this for 5 shots, I thoroughly cleaned the barrel
using solvent and dry patches.
I threw away the first empty
case I used and put a new empty case in the chamber and closed
the bolt. I impregnated a clean bore mop with J-B® Bore
Bright which has a finer grit and ran the mop back and forth
through the entire length of the bore 20 times. I fired one
low velocity round through the barrel, inserted the same empty
case into the chamber, then again ran the impregnated bore mop
back and forth through the bore several times. This again
cleaned any powder residue and fouling from the bore and
prepared it for a second shot. After performing this for 5
shots, I thoroughly cleaned the barrel using solvent and dry
patches. The bore was mirror bright and smooth and was now
ready for full pressure loads, and in theory the new throat
was polished which should help to prevent excessive fouling.
The advantages of using this
method are that the chamber throat is not excessively
lengthened due to using rougher grit, and the cartridge cases
can be reused for normal loads. As for the results, I
fired maybe 60 rounds through the new barrel and it cleaned up
with only three patches and I had no copper fouling. Now
that's success!
|
