Cold
Bluing
by Roy Seifert
Click here to purchase a
CD with this and all Kitchen Table Gunsmith Articles.
Disclaimer:
This article is for entertainment only and is not to
be used in lieu of a qualified gunsmith.
Please defer all firearms work to a qualified
gunsmith. Any loads
mentioned in this article are my loads for my guns and have
been carefully worked up using established guidelines and
special tools. The
author assumes no responsibility or liability for use of
these loads, or use or misuse of this article.
Please note that I am not a professional gunsmith,
just a shooting enthusiast and hobbyist, as well as a
tinkerer. This
article explains work that I performed to my guns without
the assistance of a qualified gunsmith.
Some procedures described in this article require
special tools and cannot/should not be performed without
them.
Warning:
Disassembling and tinkering with your firearm may
void the warranty. I
claim no responsibility for use or misuse of this article.
Again, this article is for entertainment purposes
only!
Tools
and firearms are the trademark/service mark or registered trademark
of their respective manufacturers.
Introduction
Any shooter and gun collector knows that gun metal needs to be
protected from corrosion.
Moisture from the air, moisture and oils from our
hands, even salt in the air if we live close to the ocean can
all contribute to the formation of Fe2O3 iron-oxide,
otherwise known as rust. Over
the decades firearms manufacturers have devised various
methods to protect the metal.
Today, the most common protection is called bluing.
From
Wikipedia; Bluing is a
passivation process in which steel is partially protected
against rust, and is named after the blue-black appearance of
the resulting protective finish. True
gun bluing is an electrochemical conversion coating resulting
from an oxidizing chemical reaction with iron on the surface
selectively forming magnetite (Fe3O4),
the black oxide of iron, which occupies the same volume as
metallic iron. Black
oxide provides minimal protection against corrosion, unless
also treated with a water-displacing oil to reduce wetting and
galvanic action.
In
contrast, rust, the red oxide of iron (Fe2O3),
does not occupy the same volume as iron, thereby causing the
typical reddish rusting away of iron. Both
"cold" and "hot" oxidizing processes are
called bluing, but only the "hot" process provides
any significant rust and corrosion resistance, and then only
when also treated with an oiled coating.
This explains why blued firearms must also be oiled,
and why surface rust appears on blued firearms that are not
kept oiled.
Complete
restoration of a firearm would involve hot bluing, something
that I, as a home hobbyist gunsmith, am not set up to perform.
However, for touching-up exposed areas, or bare metal
exposed from milling, filing, or cutting, I use cold blue.
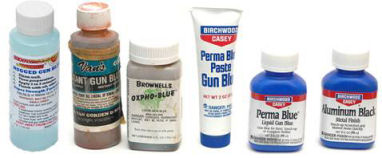
There are a
number of products on the market for cold bluing.
The products I use most are shown in the above photo.
Degrease
Before bluing a part it must be thoroughly degreased,
otherwise the bluing won’t take.
I use acetone and a Q-tip to degrease the area to be
blued. If I have
to touch the degreased area with my hands, I wear rubber or
vinyl gloves to prevent moisture and oils from my hands
getting on the bare metal.
If the metal is not properly degreased the bluing will
appear splotchy or uneven.
Properly degreasing the part is vitally important.
Shooter
Solutions Rugged Gun Blue
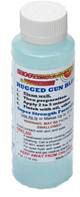
This has to be the best solution (pun
intended) for cold bluing that I have found.
The results are very close to commercial hot bluing.
This is my go-to cold blue product from now on, for
both touch-up and large items!
This product is an acid so gloves must be worn at all
times to protect skin from contact.
The instructions are somewhat difficult to read, but
the process is easy:
- Bead/sand
blast or sand if necessary
- Degrease
– I use acetone
- Dip
or soak the part until it is dark blue/black – properly
prepared metal only requires a few seconds, contaminated
metal may take longer
- Rinse
the part with water to remove the excess acid solution
- Dry
with a hair dryer, heat gun, or air compressor
- Apply
gun oil
I used this product to finish a 1911
frame, refer to my article Building
a Dedicated 1911 .22 LR Pistol.
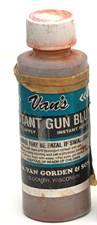
Van’s
Instant Gun Blue
This is the best, and probably most difficult product to use.
It really isn’t very “instant”!
This product produces the closest result to hot bluing
and I’ve discovered it is the best product to use for bluing
larger areas. For
best results the part must be thoroughly degreased, heated
with a hair dryer, then immersed in the bluing solution for
5-10 minutes. For
small areas the manufacturer recommends using a clean, new
toothbrush to brush the solution on the area to be blued; the
secret here is to keep the area wet and have patience;
remember, 5-10 minutes to get a deep, even blue.
A word of
caution here; immersion works well if there is no existing
bluing on the part. If
there is existing bluing on the part, rust particles form
causing the solution to turn orange.
These rust particles can attack the unblued part and
cause pitting. I
know this because I was rebluing a receiver that was already
partially blued, and when I immersed it, rust particles pitted
my newly polished receiver!
I had to draw-file and repolish the receiver, then used
the toothbrush method to blue the exposed metal.
The rust particles can be filtered by straining the
remaining solution through a coffee filter.
I
completely reblued the receiver for a Ted Williams model 100
.30-30 using Van’s and the result was stunning.
However, I had removed all of the old bluing and
totally immersed the receiver. Refer to my article Restoring
a Ted Williams Model 100 .30-30.
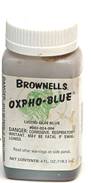
Brownells
Oxpho-Blue®
Oxpho-Blue® is manufactured by Brownells.
I use this product for touching up small areas.
Once the area is degreased, I use a Q-tip to apply the
solution and the area immediately turns dark blue-black in
color.
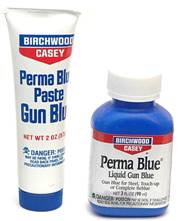
Birchwood
Casey® Perma Blu® Paste and Liquid
Birchwood Casey® makes their excellent Perma Blu®
product in both liquid and paste.
I prefer the paste because I can apply it with a Q-tip
and it stays in place, whereas with the liquid I have to
continuously keep rubbing the area.
I leave the paste in place for 3-5 minutes in order to
get a deep blue-black color.
I probably use the paste more often than any other
product.
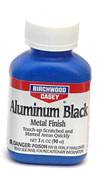
Birchwood
Casey® Aluminum Black™
Birchwood Casey® also produces a product for touching
up aluminum. I
have used this product with pretty good success for covering
up dings and scratches. Again,
the part must be thoroughly degreased, but I use a Q-tip to
apply the solution and the exposed aluminum turns black after
setting for 1-2 minutes.
Summary
Any time I expose bare metal I use cold bluing to protect that
exposed area. This
is especially important when polishing the internal area of a
blued firearm. Polishing
removes metal, and in so doing, also removes the protective
bluing. These
polished areas need to be re-blued to provide some protection,
and cold bluing is the least expensive means of providing that
protection. Cold
bluing also can enhance the appearance of an older firearm by
touching up dings and scratches.
|
