Installing
a Wide Spur Blackhawk Hammer in a Bisley Frame
by Roy Seifert
Click here to purchase a
CD with this and all Kitchen Table Gunsmith Articles.
Disclaimer:
This article is for entertainment only and is not to
be used in lieu of a qualified gunsmith.
Please defer all firearms work to a qualified
gunsmith. Any loads
mentioned in this article are my loads for my guns and have
been carefully worked up using established guidelines and
special tools. The
author assumes no responsibility or liability for use of
these loads, or use or misuse of this article.
Please note that I am not a professional gunsmith,
just a shooting enthusiast and hobbyist, as well as a
tinkerer. This
article explains work that I performed to my guns without
the assistance of a qualified gunsmith.
Some procedures described in this article require
special tools and cannot/should not be performed without
them.
Warning:
Disassembling and tinkering with your firearm may
void the warranty. I
claim no responsibility for use or misuse of this article.
Again, this article is for entertainment purposes
only!
Tools
and firearms are the trademark/service mark or registered trademark
of their respective manufacturers.
I have
always preferred a checkered, wide spur hammer on my
revolvers; especially one that I carry in the woods. The
checkered wide spur gives me greater purchase on the hammer
if my hands are cold, wet, or if I am wearing gloves. This
is especially important if the revolver is a single-action
where I have to cock the hammer every time.
Ruger
makes two styles of grip frames for their single-action
revolvers; the standard “plow share” grip, and the
Bisley grip. Each
grip comes with its own style of hammer.
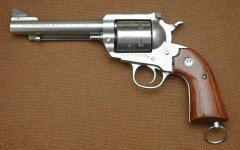
I have a stainless steel, Ruger Bisley Blackhawk with
a 5 1/2“ barrel in .45 LC that I regularly carry with me
when I hunt. The
Bisley hammer only comes with a narrow spur, so I want to
fit a wide spur standard Blackhawk hammer to my Bisley
Blackhawk. Because
of the differences in the two grip frames, a standard
Blackhawk hammer will fit in a Bisley grip frame, but a
Bisley hammer will not fit in a standard grip frame.
So fortunately, I will not have to alter the shape of
the hammer.
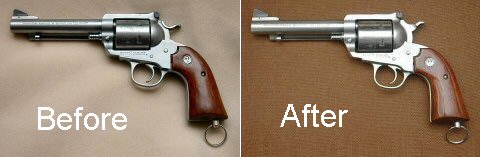
I purchased
a Super Blackhawk hammer assembly #780-000-535 from Brownells.
The standard Blackhawk hammer comes only with horizontal lines
cut into the wide spur. The
tops of these cuts are rounded, which does not provide much
purchase when cocking the hammer. So,
I will have to cut new checkering to make nice sharp points. Hand
checkering is very time consuming and not for the faint of
heart. I was
fortunate to have had personal tutoring on hand checkering by
the late Dave Sample, master gunsmith.
The first
step was to prepare the hammer for checkering. I
took a #0 pillar file and cut a notch in front of the spur. This
notch will provide clearance for the checkering file.
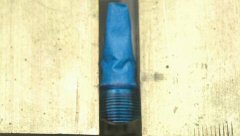
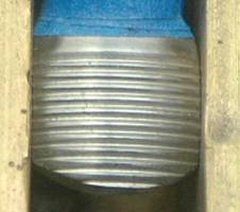
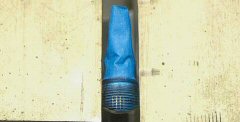
Next, I
used a blue marker to coat the spur. This
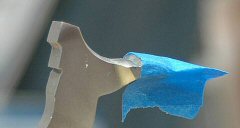
helps me to measure progress. I covered the front of the
hammer with thin leather and masking tape to prevent me from
marring the surface. I
then set the hammer in my vise about 1/4“ below the top edge
of the jaws. This
allows me to use the front edge of the bronze vise jaws as a
guide to ensure my vertical cuts are nice and straight.
Using the
edge of the bronze vice jaw as a guide, I took my 20
lines-per-inch (LPI) checkering file and began to cut the
vertical lines. The
surface of the hammer was hardened, but after I broke through
the surface, the metal cut easily. I
filed until the checkering file no longer cut metal.
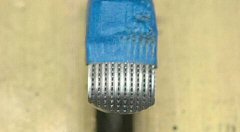
I then
raised the hammer in the vise and finished cutting all of the
vertical lines. After I complete the horizontal cuts, I will
file off the partial points on the edges.
It took me three hours to complete the vertical cuts,
primarily because I could not take full strokes with the file.
I could only take short strokes on the front of the
spur.
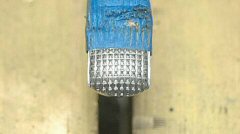
Using the
front of the spur as a guide, I cut all of the horizontal
lines. This only
took one hour because I could take long, full strokes with the
checkering file. After
I completed the horizontal cuts, I took the #0 pillar file and
removed the partial points on the edges.
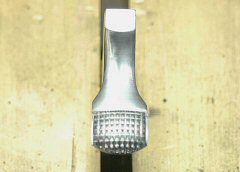
I took
strips of 400-grit wet/dry sand paper and polished out the
file marks on the top of the hammer. This
took another hour to complete.
So, this 3/4 square inch of metal took about 5 hours to
checker.
I am not
quite ready to install the hammer yet.
I now need to prepare the sear engagement surface.
I reduced the sear engagement surface to 0.014” and
polished the surface as described in my article Accurizing the Ruger Single-Action Revolver.
I
reassembled the revolver and put some Brownells Action Lube on
the hammer and sear mating surfaces.
I now have a very positive grip on the hammer spur when
I cock the hammer.
Most of the
tools I used I purchased either from Brownells
or MidwayUSA.
|