Making Black Powder
Paper Cartridges
by Roy
Seifert
Click here to purchase a CD with this and
all Kitchen Table Gunsmith Articles.
Disclaimer: This
article is for entertainment only and is not to be used in lieu of a
qualified gunsmith. Please
defer all firearms work to a qualified gunsmith.
Any loads mentioned in this article are my loads for my
guns and have been carefully worked up using established guidelines and
special tools. The
author assumes no responsibility or liability for use of these loads,
or use or misuse of this article.
Please note that I am not a
professional gunsmith, just a shooting enthusiast and hobbyist, as well
as a tinkerer. This
article explains work that I performed to my guns without the
assistance of a qualified gunsmith.
Some procedures described in this
article require special tools and cannot/should not be performed
without them.
Warning: Disassembling
and tinkering with your firearm may void the warranty.
I claim no responsibility for use
or misuse of this article. Again,
this article is for entertainment purposes only!
Tools
and firearms are the trademark/service mark or registered trademark of
their respective manufacturers. Click on any
blue text to go to a
product/seller web site.
Introduction
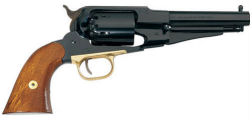
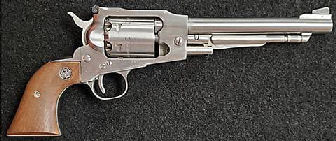
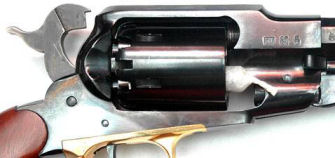
I have
three black powder revolvers in my collection; a Ruger Old Army built in 1976
with the phrase, “Made in the 200th Year of American Liberty”
engraved in the top of the barrel, and two 1858 New Army sheriff’s models built
by Pietta. All are of the
“Remington” style with a top strap.
(I never did like the looks, construction or function of a black powder Colt.)
The sheriff’s models have 5.5-inch barrels; I didn’t like the feel or
balance of the 8-inch model. I have
fired the Old Army several times with round balls and black powder and, at least
in my experience, it wasn’t very accurate.
Ok, I really didn’t do any load development or accuracy testing, so the
inaccuracy was probably all me and not the gun.
Loading a black powder revolver with loose powder and ball is somewhat tedious.
Fill each chamber with powder, add a lubricated wad, place a soft lead
ball on top of the chamber and ram it down on top of the powder/wad.
If not using a wad add grease to the top of the ball, then add a
percussion cap to the nipple. I
wanted to try making my own paper cartridges like they did during the Civil War.
I’m not looking for historical accuracy here, just an easier and quicker
method of loading.
Making
Paper Cartridge Forming Tool
I’ve watched many YouTube videos on how to make paper cartridges with the
easiest one being from Dave Berken:
https://www.youtube.com/watch?v=15O4yYu7i7Y&t=5s

I
decided to use Dave’s method because I plan to only shoot round balls from the
Pietta Remingtons, although his method will also work with conical bullets.
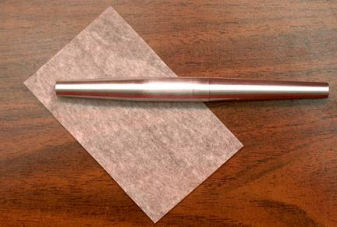
Dave starts by making a cartridge form.
I made my own form out of a 1/2” aluminum rod.
The rod was 5 1/2” long because that was what I had left from a previous
project. I turned a 2 1/2-degree
taper on one end which I use to form the paper cartridge and turned a 2-degree
taper on the other end which I use to tamp the cardboard, wad, and ball into the
paper cartridge. The diameter of
both ends was 0.325”.
Homemade Black Powder Bullet Lube
I researched a lot of videos and forum postings looking for a black powder
bullet lube I could make at home.
The purpose is to dip the felt wad into the melted lube before assembling the
bullet. I couldn’t use a
petroleum-based lube because it doesn’t mix well with black powder fouling; it
creates a heavy crud that will eventually bind up the revolver.
I found a recipe on the Internet posted by Lloyd
http://businessandbullets.com/lubrication-black-powder/.
His recipe is:
-
Crisco – this is made
from natural vegetable oils
-
Beeswax
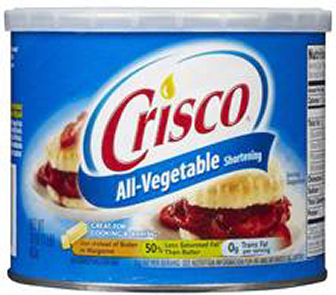
The
beeswax is the base, but it is too hard to be used alone.
The Crisco acts as a softener.
Lloyd did not provide an exact mixture, but by adjusting the amount of
Crisco, you can adjust the hardness/softness of the resulting lube depending on
the use. I wanted my lube to be hard
enough to use in the summertime and not melt off the bullets, but soft enough to
press into a chamber. I purchased a
16-ounce tub of Crisco from Wal-Mart, and beeswax pellets from eBay.
The pellets were easier to melt than a block.
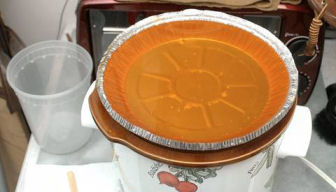
I
poured water into an old crockpot, turned it on high, and set a pie tin on top.
I started with a 50/50 mixture:
1/2-cup of Crisco and 1/2-cup of beeswax.
After everything was melted, I used a craft stick to stir the mix
together. I could have added some
wax crayons to add color, but I really liked the golden color of the lube.
I tried adjusting the mixture, but the 50/50 mix seemed to work best.
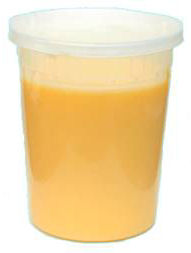
My
wife and I eat a lot of Chinese food and I keep the plastic containers.
They work great for holding small parts when I’m disassembling a firearm,
or for storage because they come with lids.
I poured the melted lube into a plastic Chinese soup container and
allowed it to solidify, then covered it with a lid to prevent it from becoming
contaminated.
Making
Lubricated Wads

I
purchased some 100% wool felt from
Amazon.com. It measures from 1/8
– 3/16 thick; perfect for making lubricated wads.
You can also find felt at
www.durofelt.com. I used a 7/16”
punch to punch cardboard separators from cat food can boxes and to punch out
felt wads. I punched on top of a
piece of leather so I wouldn’t damage the mouth of the punch.
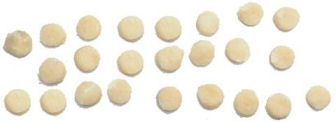
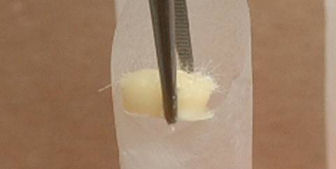
I held
a wad with small forceps, dipped it into the melted lube, then set it on wax
paper to dry. After drying I placed
the lubed wads into a plastic container.
I put the cardboard separators in another plastic box, so now I’m ready
to assemble the cartridges.
Forming the Cartridges
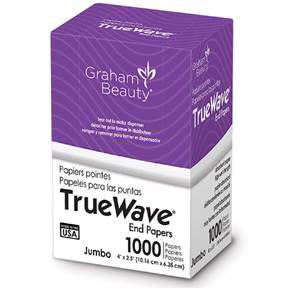
Dave
used jumbo end papers used in the cosmetic industry for coloring hair.
I went to my local Sally Beauty Supply and purchased a box of 1,000 for
about $3.25. If you don’t have a
beauty supply store handy, these cost about $5.00 from
Amazon.com. These papers are
very thin; I can see why Dave doesn’t need to nitrate them.
I
followed Dave’s video and rolled a paper around the short-tapered end of the
form and sealed it with a glue stick along the edge.

I
added a dab of glue on the exposed end flap and folded it over to seal the end.
The resulting tube is very easy to crush because the paper is so thin.
I lined them up in a Lyman case preparation box; now they’re ready to be
filled.
Adding
Powder
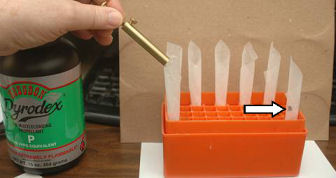
I
added 30-grains of Pyrodex black powder substitute to each paper case.
Although the photo above shows me pouring from the measure directly into
the paper case, I found that this method would cause powder to get caught in the
folds of the paper (notice the tube on the far right).
To prevent this from happening, I held the paper tube upside down, placed
it over the powder measure so the top of the measure was deep into the tube,
then turned everything over so the powder would fall into the bottom of the tube
without getting caught in the folds.
Adding
the Separator
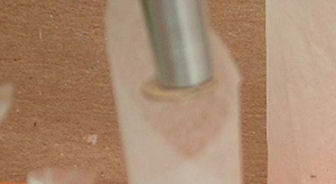
I
rubbed the long end of the forming tool with the glue stick and pressed it
against a cardboard separator, then pressed it into the tube on top of the
powder. (Sorry for the blurry
photo!) The separator prevents the
lubed wad from contaminating the powder.
I have also done this with small forceps like I do with the wad.
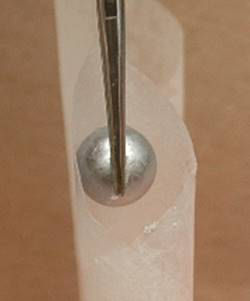
Adding
a Wad
I used
small forceps to add a lubed wad to the tube.
You can also use tweezers. I
tamped the wad down on top of the separator with my tamping tool.
Adding
the Ball
I
again used the small forceps to add the ball to the paper tube, sprue up.
I then tamped it down with the forming tool so the ball was on top of the
wad.
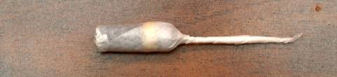
After
the ball was in the tube, I squeezed the top of the ball from outside of the
tube to press the separator, wad, and ball tightly against the powder, then
twisted the end of the paper.

I cut
off the twisted end but left a small tail.
This prevents the paper from coming unwrapped and makes it easier to
remove from the box and load into a chamber.
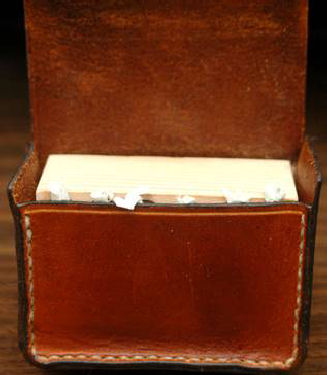
The paper cartridge is now completed and ready to be loaded into the
revolver.
When
I’m ready to load the revolver, I put the hammer on half-cock, drop the
cartridge into a chamber, rotate the cylinder until the ball is under the ram,
ram the ball down into the chamber, then throw away the paper tail after I is
cut off.
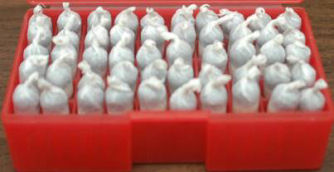
I
stored the paper cartridges in a MidwayUSA #507 plastic ammo box designed for
.45 Colt. They fit perfectly, and
the little tail makes it easy to remove a cartridge.
MidwayUSA no longer sells their own branded plastic boxes, but they do
sell plastic boxes from MTM and National Metallic in different colors and
capacities (50 or 100).
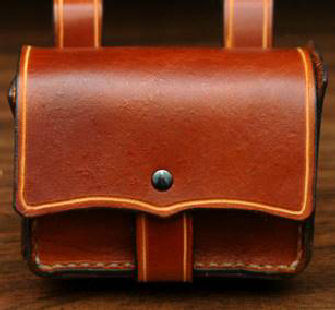
Making
a Leather Pistol Cartridge Box
I wanted to carry a quantity of cartridges on my gun belt in a leather cartridge
box similar to what was used in the civil war.
American Civil War Kits www.acwkits.com
makes a leather civil war cartridge box kit that you have to assemble and die.
This box is designed to carry two 6-round .44 or three 6-round .36
cartridge packages. You can also
find pre-assembled boxes elsewhere on the Internet.
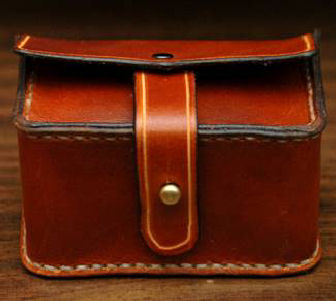
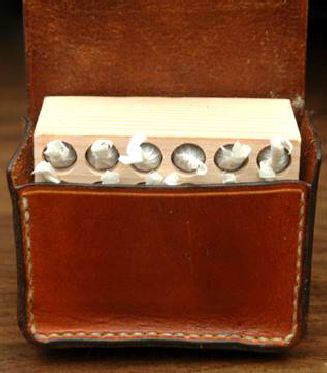
I decided to make my own pattern because I wanted to carry 24 of my .44
paper cartridges, which would give me two full cylinders for each revolver.
I carry both revolvers in left and right holsters on my gun belt.
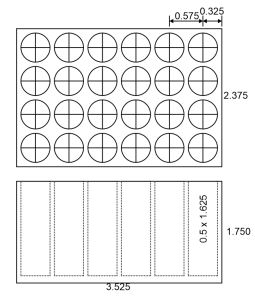
First,
I made a wooden insert to hold 24 cartridges.
I designed the insert with CorelDraw v12 then exported it to BobCAD CAM
v20 and generated the G-code for my CNC mill.
I took a piece of
4” x 4” x 7” which is really 3 1/2” x 3 1/2” x 7”.
I cut 1 1/2” off the top leaving a 4” x 2” x 7” block.
I mounted the block onto the cross-slide table of my CNC table-top mill
and used a 3/4” straight router bit to mill off 1/4” from the top.
I used a 1/4” straight router bit to drill the holes and cut out the
final outline. I took some 320-grit
sandpaper to smooth the surfaces and round the sharp corners, then coated the
wood with polyurethane. I designed
the cartridge box pattern to fit this insert.
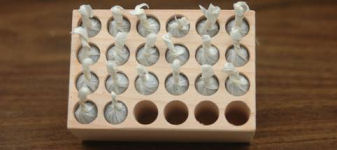
The
purpose of the insert is to protect the fragile paper cartridges.
I suppose I could fill the cartridge box with loose cartridges, but I’m
not sure how well they would survive.
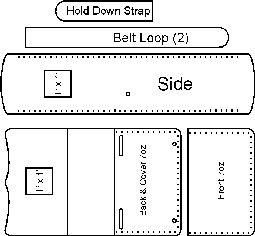
I
created a pattern using CorelDRAW v12.
I included a 1-inch square so you can copy and size the pattern
accordingly. Once properly sized you
can print them on standard letter-size paper.
This box is not exactly historically correct, but it is functional and
when completed, looks great on my gun belt!
I cut
out the leather pieces from 7-ounce leather, skived and slicked the edges, dyed
with saddle-tan, then finished with a leather-lotion/wax finish.
I used saddle tan because that is the color of my gun belt and holsters.
I used
a grooving tool to make a stitching groove 1/8-inch in from the edge around the
front (smooth side) of all the leather pieces.
I then ran a stitching wheel with a 5-stitch per inch wheel in the
stitching grooves where the pieces would join together.
I ran the stitching wheel in the front piece first starting in the upper
corner, then counted the indentations.
I counted 42 indentations in my front piece.
I made 21 indentations on each side of center on both edges of the side
piece and the bottom of the back piece.
It’s important to have the same number of stitching holes so the pieces
will line up, and they need to be centered horizontally.
I used a 1/16 drill bit and my Dremel tool to drill a hole in each
indentation.
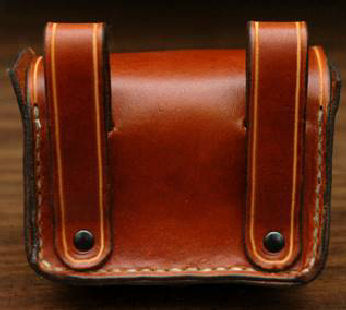
I
riveted the two belt loops to the back of the box; I had to cut them to length
so they would fit on my gun belt. I
then installed the button stud to the center of the side piece.
I positioned the stud closer to where the front of the box would be as
shown in the pattern. I
hand-stitched the box together using a saddle-stitch by running the needles and
thread through the predrilled holes.
With the wooden insert in place, I marked where the hold-down strap would go,
riveted it to the top flap, then punched a hole and cut a slot where it went
over the stud.
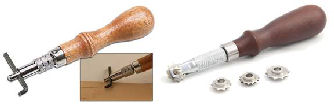
Making
an Inline Capper Case

I
purchased two Traditions inline cappers #A1203 from
Amazon.com. Each capper holds 15
caps, but I only load 12 which gives me 24 in total to match the number of paper
cartridges I carry in the above box.
I wanted to make a leather case to carry the two inline cappers on my gun belt:
kind of like a dual magazine pouch.
Notice the two screws on the side; these hold the keeper spring in place.
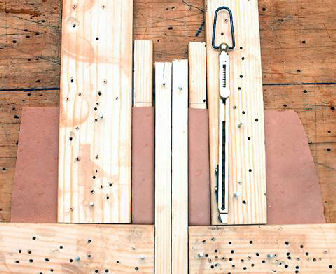
I made
two wooden forms 1/4” x 3/8” x 4” which will make the pockets for the two
cappers. They needed to be wide
enough to accommodate the two screws that attach the keeper spring to the side.
I measured where the thumb knob would be at its highest position and
marked each form. Notice the pencil
mark on each form. I thoroughly
soaked a piece of 3-ounce leather and molded it around the two forms.
I laid
the wet leather on a piece of wood and nailed two 3/8” pieces in the middle.
I then molded one side of the leather and nailed a piece of wood to hold
it down. I molded the bottom and
nailed another piece of wood to hold that in place.
I performed the same process to the other side of the leather.
After
the leather dried, I trimmed it, then cut out a 10-ounce backing and 3-ounce
belt-loop and cover. I died the
leather with the same saddle-tan color I used on the belt, holsters, and
cartridge case, then finished the leather with a leather lotion.
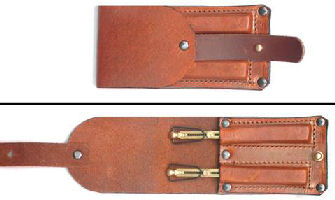
I
stitched the molded pockets onto the 10-ounce backing, then riveted the belt
loop/cover to the back. I installed
a small button stud to the bottom to hold the cover closed.
I added a 3/4” piece of leather to act as a hold-down strap.
I riveted one end to the cover, then punched a hole and cut a slit on the
other end to fit over the button stud.
The case fits perfectly on my gun belt next to the cartridge box and
allows me to quickly and easily cap a revolver without having to fumble for
loose caps.
|
